|
|
dsc08628
Nic pic of the plane! If Bill would move his head out of the way! Notice I'm using a bungee cord to hold the doors open.
Date: 04/14/2012
Views: 7220
|
|
|
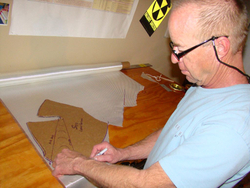
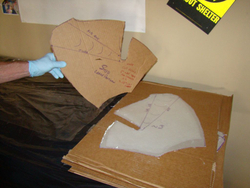
dsc09047
I took cardboard and bent it around the socket and overlapped per the manual. Then took this cardboard and made a new template for cutouts. This made the layups go really quick.
Date: 01/23/2013
Views: 7215
|
|
|
|
dsc09030
Starboard side done.
Date: 01/22/2013
Views: 7209
|
|
|
dsc09037
Making a template for rib 2. Do yourself a favor and do not use the templates in the manual you will end up waisting your plywood, just make your own.
Date: 01/23/2013
Views: 7191
|
|
|
|
dsc09046
Making a layup schedule for rib 1.
Date: 01/23/2013
Views: 7181
|
|
|
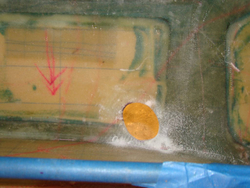
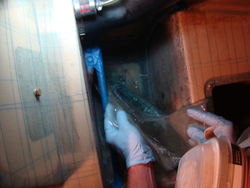
dsc09023
Ensure you have a good key. I used the drill press to create the dimples. These will be filled with 420 and flox when doing the glass layups.
Date: 01/22/2013
Views: 7169
|
|
|
|
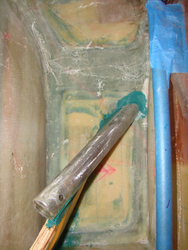
dsc09066
Port side peel ply removed. Oh notice the caps in the sockets. What I did was take a block of foam and push it down in the socket, then took it back out and covered it with car wax. Once all the ribs are in I'll see how it worked.
Date: 01/25/2013
Views: 7134
|
|
|
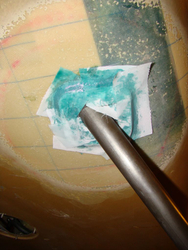
dsc09049
Layup Port side complete with peel ply. Notice the glad wrap to keep air from getting under the peel ply. 420 = 46g, aeropoxy ~ 200g
Date: 01/24/2013
Views: 7130
|
|
|
|
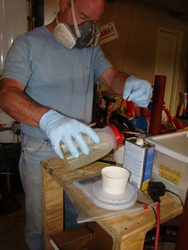
dsc09051
Mix it up Kim! FYI I hate this scale from aircraft spruce, it times out in one min if your plugged in or not. I would have to tap the scale while Kim mixed. We were using masks due to being in an enclosed area and I'm very allergic to the hardener (bumm
Date: 01/24/2013
Views: 7121
|
|
|
dsc09036
Rib one port side again used around 112g of 420 cured at 78f for 12 hours.
Date: 01/23/2013
Views: 7079
|
|
|
|
dsc09076
Bottom layup of the port side.
Date: 01/26/2013
Views: 7053
|
|
|
dsc09062
Bill applying peel ply!
Date: 01/24/2013
Views: 7050
|
|
|
|
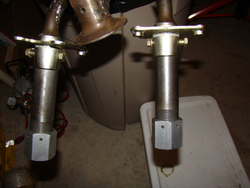
dsc09070
While the layups are curing we stared work on the axles. Had to ream out the holes forMG02.
Date: 01/25/2013
Views: 7042
|
|
|
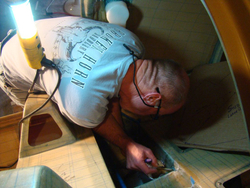
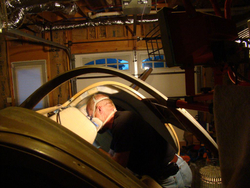
dsc09072
Here is a shot of the working angle. This was so much better than leaning over the edge. Kim's idea. Notice the heater behind Kim, this was key to keeping the temps even though the temps outside were in the 40's.
Date: 01/26/2013
Views: 7029
|
|
|
|
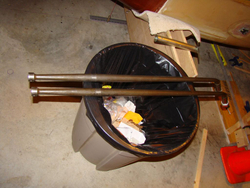
dsc09019
Trash can is the best way to hold the landing gear legs.
Date: 01/10/2013
Views: 7020
|
|
|
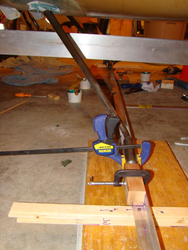
dsc09029
Gear legs clamped in place, no toe in/out per Bud. You cant see it in the photo but I used a green tip .30 bullet as a homemade plum bob that was attached to dead center of the aluminum angle. This helped us keep the guide over the center line. Oh make
Date: 01/22/2013
Views: 7017
|
|
|
|
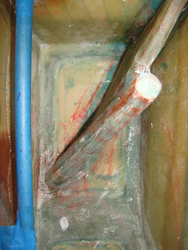
dsc09024
I was really anal about keeping the socket holes tight. This proved to be more work than it was worth and was fighting the tight fit when it came to locating the axles. Do yourself a favor and just make them a little bigger, 1/8 or so. This gap will be
Date: 01/22/2013
Views: 7003
|
|
|
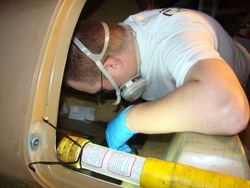
dsc09064
Bill does nice peel ply work!
Date: 01/24/2013
Views: 7000
|
|
|
|
dsc09060
Wetting out stbd side.
Date: 01/24/2013
Views: 6991
|
|
|
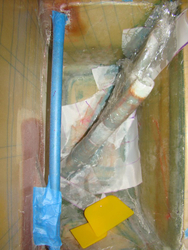
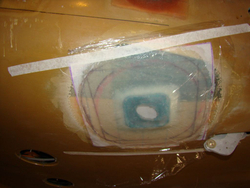
dsc09048
Template for the Stbd side. Note, you are not required per the manual to hook over the plywood with bid.
Date: 01/24/2013
Views: 6965
|
|