|
|
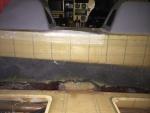
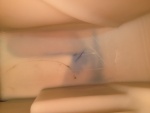
IMG_6973_em_sa
Here I have annotated the important elements. The red outlines the fiberglass support bonded to the bottom of the tank. Blue arrow points to the blue crack. The crack formed exactly as a stress analysis says it should, at 45º to the corner of that supp
Date: 10/18/2013
Views: 3347
|
|
|
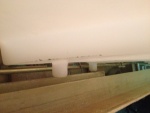
IMG_7290
Bonded in the foam and cork support for the "ledge" at the front of the tank.
Date: 02/14/2014
Views: 4041
|
|
|
|
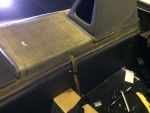
IMG_6994
Seeing where the passenger door sill will have to be cut to allow the tank to go in.
Date: 10/21/2013
Views: 4443
|
|
|
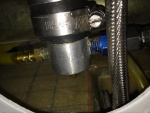
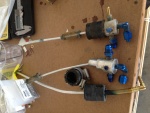
IMG_7335
New sight gage connection clamped and fuel tight. The outlet to the fuel selector has been connected.
Date: 02/17/2014
Views: 4962
|
|
|
|
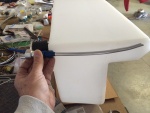
IMG_7324
Checking the back. Looks like a good fit overall.
Date: 02/17/2014
Views: 5883
|
|
|
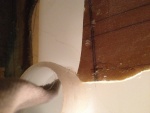
IMG_7430
The front has bonded nicely around the sight gage entry.
Date: 03/11/2014
Views: 4064
|
|
|
|
IMG_6989
In addition, the aileron tie rod between the sticks is in the way and will have to come out.
Date: 10/21/2013
Views: 5485
|
|
|
IMG_7281
This picture illustrates how the new vent will be installed to obtain the best venting possible within the limits of the tank.
Date: 02/13/2014
Views: 4675
|
|
|
|
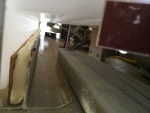
IMG_7014
Next catch was where the filler needed to go into its' position. There was a piece blocking which had to be removed.
Date: 10/23/2013
Views: 5558
|
|
|
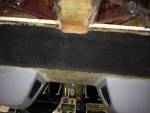
IMG_7438
The back is well bonded across the width of the wall, as are the two sides.
Date: 03/11/2014
Views: 5336
|
|
|
|
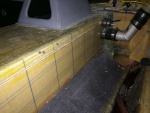
IMG_7230
It was determined that a 1/4 in (6.4 mm) thick piece of rigid urethane foam topped with cork was needed to support the front "ledge" of the tank so it wouldn't sag.
Date: 01/26/2014
Views: 5244
|
|
|
IMG_7567
Time to start putting upholstery back in place.
Date: 03/29/2014
Views: 5022
|
|
|
|
IMG_6843
Back from KOSH, I get out my video snake and try to run it down into the tank to find the leak.
Date: 10/01/2013
Views: 3919
|
|
|
IMG_7770
Calibrated sight gage with LED illumination. This really does help identify the fuel level. FYI: 6 gal to the bottom of the lower P-Clip, 7 gal to the top of the P-Clip, 8 gal to the 1st white tie, 9 gal to the 2nd tie, 10 gal to the 1st black tie, 12 g
Date: 05/18/2014
Views: 4629
|
|
|
|
IMG_6855
But I can't get it past the entrance to the tank. Looks like I'll have to tear into things.
Date: 10/01/2013
Views: 4233
|
|
|
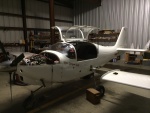
IMG_6960 1
One needs some room near the cockpit so the wings come off. In addition, all the connections to the fuel tank were removed.
Date: 11/10/2013
Views: 4092
|
|
|
|
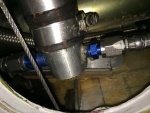
IMG_7356
The starboard side outlet with all fuel lines connected.
Date: 02/19/2014
Views: 3920
|
|
|
IMG_6858
The old fittings as removed from the old tank. Vent on left, starboard outlet in the middle and port outlet on the right.
Date: 10/01/2013
Views: 4899
|
|
|
|
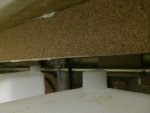
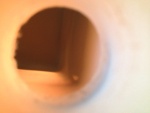
IMG_6973
In this view fore is down, aft is up, port to the right and starboard to the left.
Date: 10/18/2013
Views: 3835
|
|
|
IMG_7712
Door sill repaired.
Date: 05/04/2014
Views: 5347
|
|