|
|
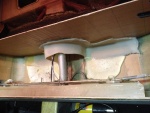
IMG_7712
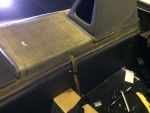
Door sill repaired.
Date: 05/04/2014
Views: 6583
|
|
|
IMG_7430
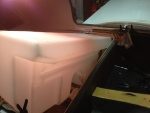
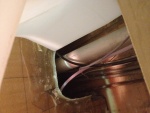
The front has bonded nicely around the sight gage entry.
Date: 03/11/2014
Views: 5015
|
|
|
|
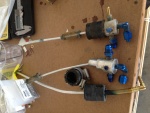
IMG_7315
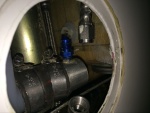
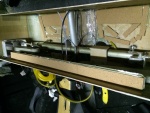
The starboard side outlet installed. Fuel outlet to the fuel selector is on the port side and fuel return from the engine is on the starboard side.
Date: 02/17/2014
Views: 5606
|
|
|
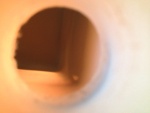
IMG_6985
And no amount of "coaxing" will prevail allowing entrance.
Date: 10/21/2013
Views: 5013
|
|
|
|
IMG_6962
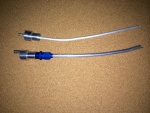
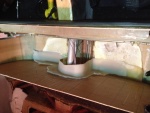
Old 1/4 in (6.4 mm) vent on the top. Totally inadequate for the job. New 3/8 in (9.5 mm) vent on the bottom.
Date: 11/13/2013
Views: 5076
|
|
|
IMG_6996
You also have to make sure you clear all the cables, plumbing and wiring in the "tunnel" area.
Date: 10/21/2013
Views: 5442
|
|
|
|
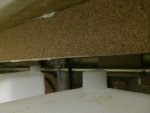
IMG_7226
Here the urethane on the aluminum ledge has also been covered with cork. The cork both served to protect the tank and the urethane.
Date: 01/19/2014
Views: 4962
|
|
|
IMG_6976
At this point all that's left is that portion of the tank which was bonded to the back of the back rest.
Date: 10/19/2013
Views: 4707
|
|
|
|
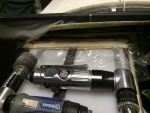
IMG_6971
The top of the old tank exposed. At this point the rotary tool was used to attack the old tank.
Date: 10/18/2013
Views: 4751
|
|
|
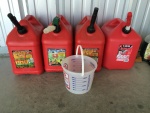
IMG_7768
There's 18 gallons of AvGas in those 4 5-gallon gas cans.
Date: 05/18/2014
Views: 5861
|
|
|
|
IMG_7290
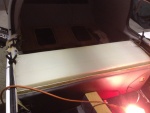
Bonded in the foam and cork support for the "ledge" at the front of the tank.
Date: 02/14/2014
Views: 5135
|
|
|
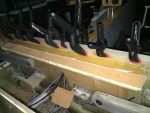
IMG_7235
A strip being bonded to the front wall.
Date: 01/31/2014
Views: 5181
|
|
|
|
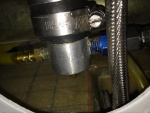
IMG_7335
New sight gage connection clamped and fuel tight. The outlet to the fuel selector has been connected.
Date: 02/17/2014
Views: 5974
|
|
|
IMG_6855
But I can't get it past the entrance to the tank. Looks like I'll have to tear into things.
Date: 10/01/2013
Views: 5209
|
|
|
|
IMG_7383
Port fuel outlet . There was one small leak on the outlet to the fuel selector. I had wrenches ready, just in case, so it was easy to tighten that last bit to end the leak.
Date: 02/23/2014
Views: 4715
|
|
|
IMG_6977
The white stuff you see is low-expansion foam that was squirted in to provide support so this wouldn't happen. Unfortunately, I could not get foam under the port side sufficiently to support that side. That's where the crack developed.
Date: 10/19/2013
Views: 5136
|
|
|
|
IMG_6858
The old fittings as removed from the old tank. Vent on left, starboard outlet in the middle and port outlet on the right.
Date: 10/01/2013
Views: 6041
|
|
|
IMG_6958
Tear out the interior to gain access to the upper part of the back where the fuel tank resides.
Date: 10/17/2013
Views: 5025
|
|
|
|
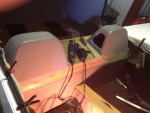
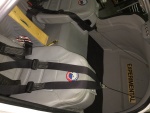
IMG_7736
Reinstalled the shoulder harnesses and seats
Date: 05/10/2014
Views: 6213
|
|
|
IMG_7366
Applying the fiberglass/epoxy strips to the port side. Plastic wrap to prevent the epoxy from bonding to the tools used to hold the strip in place.
Date: 02/22/2014
Views: 6411
|
|