|
|
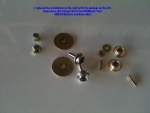
3_snaps
Went to good old McMaster-Carr and, sure enough, they had multiple options for screw-down snap bases. Ordered these nice stainless steel snap bases with integral 6-32 screw. Used AN970 washers and nylock nuts to hold them on. Nyloc because when I remov
Date: 06/23/2011
Views: 2835
|
|
|
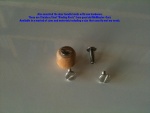
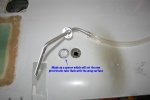
1_Door_Knobs
I didn't like the previous door handle hardware. Threaded end with nut stuck out and caught on the door handle guard plate when the handle was pushed closed. Purchased new stainless steel binding posts from McMaster-Carr. Worked great. More detail und
Date: 06/23/2011
Views: 2862
|
|
|
|
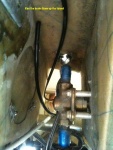
IMG_1423ann
Ran the left and right brake line up through the tunnel.
Date: 12/20/2010
Views: 3416
|
|
|
IMG_0086post
Date: 09/02/2010
Views: 2588
|
|
|
|
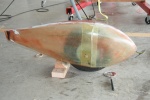
IMG_1305
Outside fitting
Date: 04/14/2011
Views: 3080
|
|
|
IMG_1593ann
Installed the master cylinder and parking brake and began connecting brake lines.
Date: 03/16/2011
Views: 3626
|
|
|
|
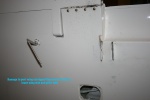
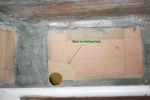
IMG_0458ann
I've gone back to the build manual and made up a pair of reinforcements. Here marking where the upholstery will be cut to make a place for them.
Date: 10/20/2010
Views: 3006
|
|
|
IMG_0231post
Date: 09/10/2010
Views: 2702
|
|
|
|
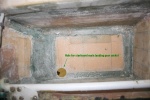
IMG_0454ann
2010 10 16 - Since I had to replace the pitot/static tube anyway, I decided to make up a spacer to get the mount flush with the wing surface.
Date: 10/16/2010
Views: 3024
|
|
|
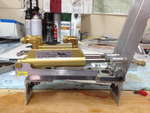
New MC-4A01
2012 04 12 - Well, didn't take very long today to decide the new brake assembly wouldn't fit. It's too long.
Date: 04/11/2012
Views: 3164
|
|
|
|
IMG_0456ann
2010 10 18 Mounted the new brake master cylinder with clecos to establish the location and size of the hole in the console needed for the brake levers.
Date: 10/18/2010
Views: 2932
|
|
|
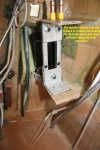
IMG_1446ann
Final brake plumbing and other stuff installed below the tunnel.
Date: 06/04/2011
Views: 2892
|
|
|
|
IMG_1370em
The port side went on just fine. Had to contact the vendor and arrange for a new X.
Date: 05/18/2011
Views: 2934
|
|
|
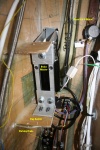
IMG_1668
Began fitting the brake fluid reservoir.
Date: 04/13/2011
Views: 3136
|
|
|
|
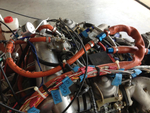
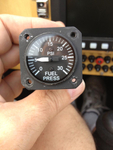
IMG_3384em
Remove the Billet pump from the circuit. Run with only electric pump. Input line connected directly to the regulator. At the same time, remove airbox pressure from differential gauge to get absolute fuel pressure out of regulator.
Date: 07/09/2012
Views: 4427
|
|
|
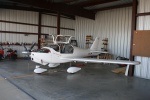
Wings on 1
Tommy and Russ stopped by to help me put the wings back on.
Date: 07/01/2011
Views: 3214
|
|
|
|
IMG_3391em
Input fuel pressure: 5 lbs. Just like with the Billet pump. Next request was for a fuel flow test. Reconnected the Billet pump to the fuel circult. One electric pump running fuel through the billet pump produced 1 gallon of fuel in a bit less than 3 m
Date: 07/09/2012
Views: 6276
|
|
|
IMG_0056post
Date: 09/01/2010
Views: 2997
|
|
|
|
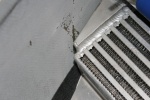
IMG_1365
Upon closer examination, the corner of the intercooler was impinging in the cowl preventing it going into place.
Date: 05/17/2011
Views: 3086
|
|
|
IMG_0038post
Date: 09/01/2010
Views: 3645
|
|