|
|
IMG_2501
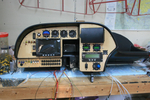
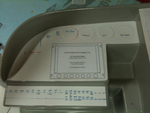
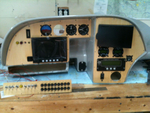
The full panel. Instrument final fit.
Date: 11/23/2011
Views: 4718
|
|
|
IMG_2456 1
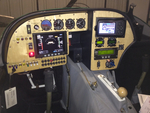
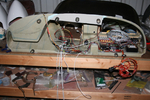
This is a picture from the first big "smoke test."
Date: 02/10/2012
Views: 3355
|
|
|
|
IMG_2468
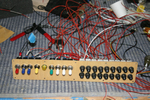
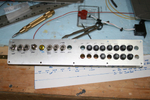
Wiring begins in earnest. Color coding has been added to the switches. Red-Master, Blue-Ignition, Yellow-Starter, Green-Boost Pump & White-Lighting.
Date: 11/13/2011
Views: 3769
|
|
|
IMG_2490
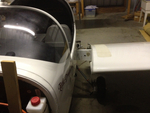
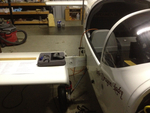
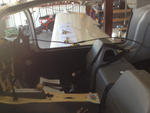
2012 Annual Condition Inspection. Opened it up and pulled the wings.
Date: 02/24/2012
Views: 3119
|
|
|
|
IMG_2437
Eventually, the 2nd alternator and supporting H/W will go. Also, I have Parahelion copper-clad aluminum fat wire which will replace the existing fat wire.
Date: 10/15/2011
Views: 3610
|
|
|
IMG_2491
Other wing. I'll only show a few of the pics from the annual.
Date: 02/24/2012
Views: 3519
|
|
|
|
IMG_2313
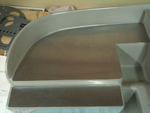
Panel plates were cut from aluminum and fitted to the fiberglass.
Date: 10/06/2011
Views: 5582
|
|
|
IMG_2523
But I'm still piddling around with the wiring and cabling. Found out today that the GRT Sport SX will control a Garmin SL30 radio and the Microair 760 will support SL30 type input/output. So, I'm working on adding the necessary wiring between the two.
Date: 01/03/2012
Views: 3313
|
|
|
|
IMG_2559
Add the 2 meter extension to the 1 meter length and run the viewer down to the brake area.
Date: 03/12/2012
Views: 4290
|
|
|
IMG_2498
Switches and breakers have been labeled.
Date: 11/22/2011
Views: 3698
|
|
|
|
IMG_2460
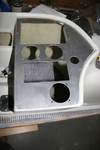
Used our hydraulic punch to poke out the round holes. The rectangular holes were corner drilled and cut out with aircraft shears. Files were used to clean up the holes in shape and size.
Date: 10/27/2011
Views: 7118
|
|
|
IMG_2537
Here you can see the numerous check lists used in the inspections laid out on the wing.
Date: 03/02/2012
Views: 3743
|
|
|
|
IMG_2461
The two main panels cut, poked and in place.
Date: 10/27/2011
Views: 6773
|
|
|
IMG_2309
The obvious place to begin weight reduction was the ridiculously heavy instrument panel. Removed it and put the Garmin radios, etc. up for sale. Meanwhile, I began to lay out the instrument configuration in the old panel.
Date: 10/06/2011
Views: 7109
|
|
|
|
IMG_2447
Started to make up the switch and breaker panel.
Date: 10/24/2011
Views: 5477
|
|
|
IMG_2518
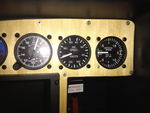
And 140 Kts on the airspeed (right on)
Date: 02/28/2012
Views: 3856
|
|
|
|
IMG_2538
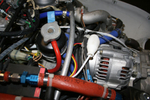
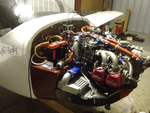
Uncowled engine open for inspection of all the wiring and plumbing and physical connections.
Date: 03/02/2012
Views: 3713
|
|
|
IMG_2065
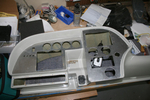
The GRT Sport has arrived and almost all the instruments have been set in their panels. This is a test fit. It was necessary to adjust the big opening in the main for clearance of some of the various instruments.
Date: 11/05/2011
Views: 6018
|
|
|
|
IMG_2125
These 8 lbs of instruments were removed from the old panel along with the approximately 35 lbs of Garmin H/W.
Date: 11/24/2011
Views: 3695
|
|
|
IMG_2462
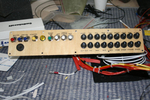
Here is the switch & breaker panel all nicely assembled. Don't know if you can tell, but the bottom row of breakers (except for the first one) are all upside down.
Date: 10/28/2011
Views: 4239
|
|