|
|
IMG_7384
Starboard side fuel outlet. No leaks here
Date: 02/23/2014
Views: 4506
|
|
|
IMG_7005
The space with the aileron tie rod and starboard side support removed.
Date: 10/22/2013
Views: 5566
|
|
|
|
IMG_7230
It was determined that a 1/4 in (6.4 mm) thick piece of rigid urethane foam topped with cork was needed to support the front "ledge" of the tank so it wouldn't sag.
Date: 01/26/2014
Views: 6394
|
|
|
IMG_6962
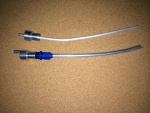
Old 1/4 in (6.4 mm) vent on the top. Totally inadequate for the job. New 3/8 in (9.5 mm) vent on the bottom.
Date: 11/13/2013
Views: 5097
|
|
|
|
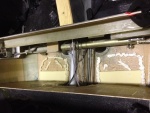
IMG_7319
A test fit of the top. Check of the front.
Date: 02/17/2014
Views: 5017
|
|
|
IMG_7004
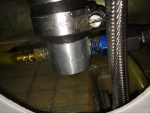
Here you see that the fuel outlets won't go past the pitch connection rod between the sticks. And this can not be removed to be replaced at a later date. The outlets have to be trimmed back by about 1/4 in (6.4 mm).
Date: 10/22/2013
Views: 6194
|
|
|
|
IMG_7430
The front has bonded nicely around the sight gage entry.
Date: 03/11/2014
Views: 5044
|
|
|
IMG_7383
Port fuel outlet . There was one small leak on the outlet to the fuel selector. I had wrenches ready, just in case, so it was easy to tighten that last bit to end the leak.
Date: 02/23/2014
Views: 4740
|
|
|
|
IMG_6996
You also have to make sure you clear all the cables, plumbing and wiring in the "tunnel" area.
Date: 10/21/2013
Views: 5467
|
|
|
IMG_6989
In addition, the aileron tie rod between the sticks is in the way and will have to come out.
Date: 10/21/2013
Views: 6729
|
|
|
|
IMG_7281
This picture illustrates how the new vent will be installed to obtain the best venting possible within the limits of the tank.
Date: 02/13/2014
Views: 5610
|
|
|
IMG_7232
Must have had the tank in/out two dozen times determining necessary clearances and supports.
Date: 01/26/2014
Views: 5338
|
|
|
|
IMG_7735
Not as nice as it was but still not looking too shabby.
Date: 05/10/2014
Views: 6257
|
|
|
IMG_6976
At this point all that's left is that portion of the tank which was bonded to the back of the back rest.
Date: 10/19/2013
Views: 4725
|
|
|
|
IMG_7769
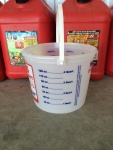
And this is the 1 gallon measure used to return fuel to the tank.
Date: 05/18/2014
Views: 7306
|
|
|
IMG_7382
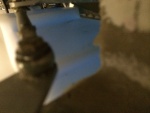
Blue fuel in the tank.
Date: 02/23/2014
Views: 5040
|
|
|
|
IMG_7335
New sight gage connection clamped and fuel tight. The outlet to the fuel selector has been connected.
Date: 02/17/2014
Views: 5997
|
|
|
IMG_7029
Supporting material in the form of rigid polyurethane sheet and micro/epoxy mix are laid out on the bottom of the fuselage.
Date: 10/31/2013
Views: 4840
|
|
|
|
IMG_6971
The top of the old tank exposed. At this point the rotary tool was used to attack the old tank.
Date: 10/18/2013
Views: 4774
|
|
|
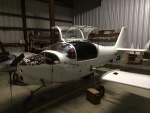
IMG_6960 1
One needs some room near the cockpit so the wings come off. In addition, all the connections to the fuel tank were removed.
Date: 11/10/2013
Views: 5013
|
|