|
|
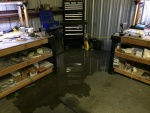
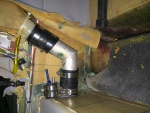
IMG_7536
It was a pretty good flow of water for a while. Flooding the back of the hanger. No real damage as, from previous experience, I try to keep things off the hanger floor in any case.
Date: 03/20/2014
Views: 7231
|
|
|
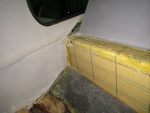
IMG_7226
Here the urethane on the aluminum ledge has also been covered with cork. The cork both served to protect the tank and the urethane.
Date: 01/19/2014
Views: 5077
|
|
|
|
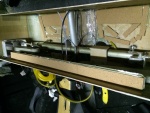
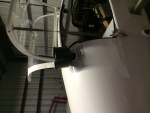
IMG_7314
The port side outlet installed. Fuel outlet to the fuel selector is on the starboard side and the outlet to the new sight gage on the port side.
Date: 02/17/2014
Views: 5292
|
|
|
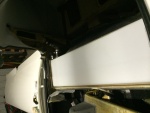
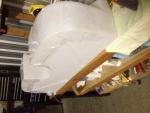
IMG_7312
With one final overall fit of the tank.
Date: 02/17/2014
Views: 7500
|
|
|
|
IMG_6985
And no amount of "coaxing" will prevail allowing entrance.
Date: 10/21/2013
Views: 5095
|
|
|
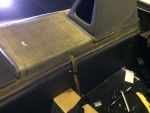
IMG_7322
Checking the back.
Date: 02/17/2014
Views: 6687
|
|
|
|
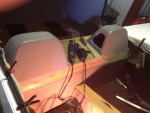
IMG_6958
Tear out the interior to gain access to the upper part of the back where the fuel tank resides.
Date: 10/17/2013
Views: 5114
|
|
|
IMG_6994
Seeing where the passenger door sill will have to be cut to allow the tank to go in.
Date: 10/21/2013
Views: 5595
|
|
|
|
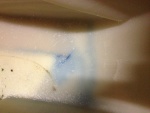
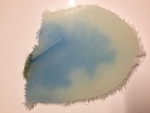
IMG_6972
Standing on the port side looking down into the tank. The leak is that blue line with the lighter blue background.
Date: 10/18/2013
Views: 4683
|
|
|
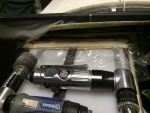
IMG_7374
The filtering funnel keeps crap out of the fuel tank
Date: 02/22/2014
Views: 4367
|
|
|
|
IMG_7027
The underside of the fuel tank is covered in plastic wrap which will prevent the tank from bonding to the epoxy in the micro.
Date: 10/30/2013
Views: 5049
|
|
|
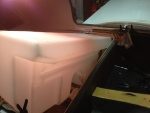
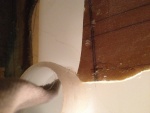
IMG_7366
Applying the fiberglass/epoxy strips to the port side. Plastic wrap to prevent the epoxy from bonding to the tools used to hold the strip in place.
Date: 02/22/2014
Views: 6576
|
|
|
|
IMG_6975
The crack as viewed from the underside. it is about 1 5/8 in (4 cm) long and 1/32 in (1 mm) wide. Notice the blue staining on the underside surface.
Date: 10/19/2013
Views: 6413
|
|
|
IMG_6978
The crack as viewed from the top side.
Date: 10/19/2013
Views: 5074
|
|
|
|
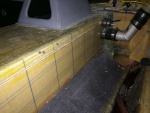
IMG_7324
Checking the back. Looks like a good fit overall.
Date: 02/17/2014
Views: 7303
|
|
|
IMG_7014
Next catch was where the filler needed to go into its' position. There was a piece blocking which had to be removed.
Date: 10/23/2013
Views: 6848
|
|
|
|
IMG_7430
The front has bonded nicely around the sight gage entry.
Date: 03/11/2014
Views: 5112
|
|
|
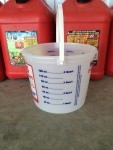
IMG_7769
And this is the 1 gallon measure used to return fuel to the tank.
Date: 05/18/2014
Views: 7434
|
|
|
|
IMG_7313
The filler neck and vent installed in the tank.
Date: 02/17/2014
Views: 5701
|
|
|
IMG_7285
The new sight gage running up the back rest. 2 P-clips hold it in place. The new sight gage is also back lit with a strip of LED lights.
Date: 02/13/2014
Views: 5108
|
|