|
|
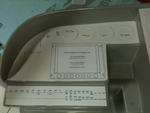
IMG_2462
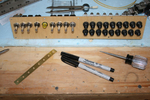
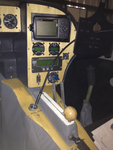
Here is the switch & breaker panel all nicely assembled. Don't know if you can tell, but the bottom row of breakers (except for the first one) are all upside down.
Date: 10/28/2011
Views: 4140
|
|
|
IMG_2307
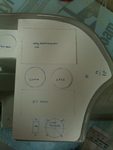
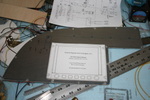
Cardboard cutouts and templates were used to shape and size the panels and to decide where instruments should go.
Date: 10/06/2011
Views: 4554
|
|
|
|
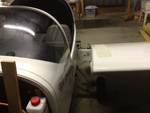
IMG_2554
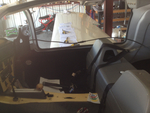
After a preliminary W&B done last week, the CG was now somewhat aft. After all, I had removed almost 40 lbs (18 Kilos) from the instrument panel and another 7 lbs (3 kilos) from the engine compartment. So I pulled the battery from below the baggage
Date: 02/21/2012
Views: 3201
|
|
|
IMG_2461
The two main panels cut, poked and in place.
Date: 10/27/2011
Views: 6567
|
|
|
|
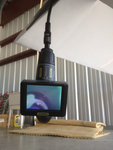
IMG_2571
The nasty job of bleeding brakes. How do you do it without assistance? You get out the inspection camera and point the camera head at the brake reservoir.
Date: 03/12/2012
Views: 4121
|
|
|
IMG_2512
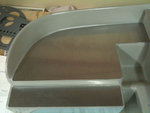
Did numerous test fit insertions of the instrument panel shell. I think I finally have it ready to install.
Date: 12/16/2011
Views: 3627
|
|
|
|
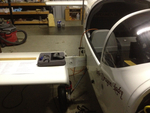
IMG_2538
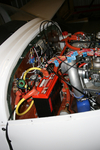
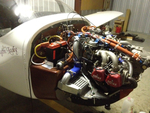
Uncowled engine open for inspection of all the wiring and plumbing and physical connections.
Date: 03/02/2012
Views: 3645
|
|
|
IMG_2502
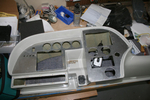
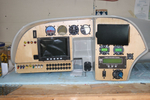
Just the instruments. The wiring of everything in back will be the next big project.
Date: 11/23/2011
Views: 3413
|
|
|
|
IMG_2468
Wiring begins in earnest. Color coding has been added to the switches. Red-Master, Blue-Ignition, Yellow-Starter, Green-Boost Pump & White-Lighting.
Date: 11/13/2011
Views: 3707
|
|
|
IMG_2309
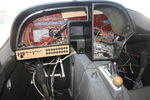
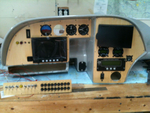
The obvious place to begin weight reduction was the ridiculously heavy instrument panel. Removed it and put the Garmin radios, etc. up for sale. Meanwhile, I began to lay out the instrument configuration in the old panel.
Date: 10/06/2011
Views: 6877
|
|
|
|
IMG_2490
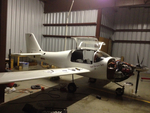
2012 Annual Condition Inspection. Opened it up and pulled the wings.
Date: 02/24/2012
Views: 3011
|
|
|
IMG_2491
Other wing. I'll only show a few of the pics from the annual.
Date: 02/24/2012
Views: 3401
|
|
|
|
IMG_2565
You can see the bubbles of air coming from the brake line as you push fluid in from below. You can also manipulate the brake master to assist the flow of air out of the system.
Date: 03/12/2012
Views: 5924
|
|
|
IMG_2451
Templates were used to transfer the instrument locations to the aluminum panels for cutting.
Date: 10/24/2011
Views: 4836
|
|
|
|
IMG_2065
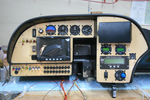
The GRT Sport has arrived and almost all the instruments have been set in their panels. This is a test fit. It was necessary to adjust the big opening in the main for clearance of some of the various instruments.
Date: 11/05/2011
Views: 5914
|
|
|
IMG_2470
Another test fit. Getting better. Still waiting on the electroluminescent light ring for the altimeter.
Date: 11/13/2011
Views: 3563
|
|
|
|
IMG_2313
Panel plates were cut from aluminum and fitted to the fiberglass.
Date: 10/06/2011
Views: 5451
|
|
|
IMG_2559
Add the 2 meter extension to the 1 meter length and run the viewer down to the brake area.
Date: 03/12/2012
Views: 4185
|
|
|
|
IMG_2537
Here you can see the numerous check lists used in the inspections laid out on the wing.
Date: 03/02/2012
Views: 3651
|
|
|
IMG_2513
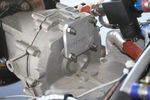
Had to make up a new cover plate for the back of the transmission where alternator #2 formerly resided.
Date: 12/16/2011
Views: 3111
|
|