|
|
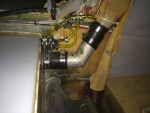
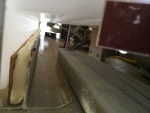
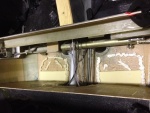
IMG_7005
The space with the aileron tie rod and starboard side support removed.
Date: 10/22/2013
Views: 5652
|
|
|
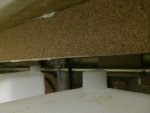
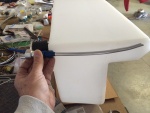
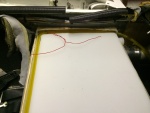
IMG_7290
Bonded in the foam and cork support for the "ledge" at the front of the tank.
Date: 02/14/2014
Views: 5241
|
|
|
|
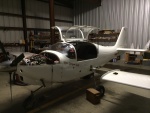
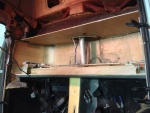
IMG_6960 1
One needs some room near the cockpit so the wings come off. In addition, all the connections to the fuel tank were removed.
Date: 11/10/2013
Views: 5128
|
|
|
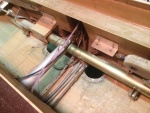
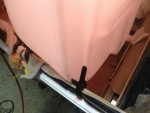
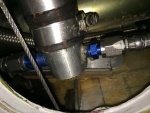
IMG_7315
The starboard side outlet installed. Fuel outlet to the fuel selector is on the port side and fuel return from the engine is on the starboard side.
Date: 02/17/2014
Views: 5703
|
|
|
|
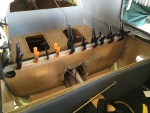
IMG_7373
The vent system with all vent lines from the fuel sight gage and tank vents connected to the aircraft filler vent system.
Date: 02/22/2014
Views: 5566
|
|
|
IMG_7568
And reconnecting the aileron tie rods.
Date: 03/29/2014
Views: 6770
|
|
|
|
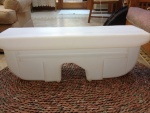
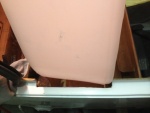
IMG_6957
Front side of the new tank.
Date: 10/17/2013
Views: 4797
|
|
|
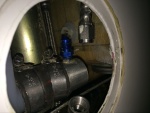
IMG_7282
Two venting outlets.
Date: 02/13/2014
Views: 5679
|
|
|
|
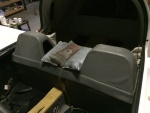
IMG_7730
Returned the upholstery on to the back.
Date: 05/09/2014
Views: 6997
|
|
|
IMG_7230
It was determined that a 1/4 in (6.4 mm) thick piece of rigid urethane foam topped with cork was needed to support the front "ledge" of the tank so it wouldn't sag.
Date: 01/26/2014
Views: 6484
|
|
|
|
IMG_6995
The cutout in the passenger door sill now allows entry of the tank.
Date: 10/21/2013
Views: 7584
|
|
|
IMG_7314
The port side outlet installed. Fuel outlet to the fuel selector is on the starboard side and the outlet to the new sight gage on the port side.
Date: 02/17/2014
Views: 5316
|
|
|
|
IMG_7281
This picture illustrates how the new vent will be installed to obtain the best venting possible within the limits of the tank.
Date: 02/13/2014
Views: 5706
|
|
|
IMG_7567
Time to start putting upholstery back in place.
Date: 03/29/2014
Views: 6357
|
|
|
|
IMG_7029
Supporting material in the form of rigid polyurethane sheet and micro/epoxy mix are laid out on the bottom of the fuselage.
Date: 10/31/2013
Views: 4909
|
|
|
IMG_7365
Getting the sight gage plumbing in place.
Date: 02/22/2014
Views: 6932
|
|
|
|
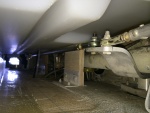
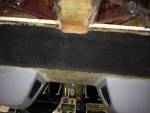
IMG_6982
The tank must go into this space.
Date: 10/21/2013
Views: 6159
|
|
|
IMG_6984
But there's no way to get it in. It is too wide to go between the door sills.
Date: 10/21/2013
Views: 5302
|
|
|
|
IMG_7233
2-ply fiberglass strips were made up to be bonded to the inside of the unit. These strips went on all 4 sides. Here the strip is being bonded to the aft wall.
Date: 01/26/2014
Views: 6503
|
|
|
IMG_7356
The starboard side outlet with all fuel lines connected.
Date: 02/19/2014
Views: 4911
|
|