|
|
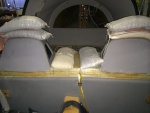
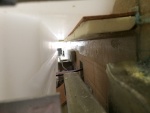
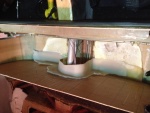
IMG_6995
The cutout in the passenger door sill now allows entry of the tank.
Date: 10/21/2013
Views: 7453
|
|
|
IMG_7282
Two venting outlets.
Date: 02/13/2014
Views: 5595
|
|
|
|
IMG_7438
The back is well bonded across the width of the wall, as are the two sides.
Date: 03/11/2014
Views: 6681
|
|
|
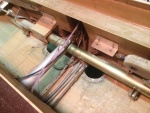
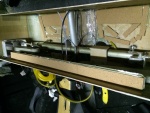
IMG_7005
The space with the aileron tie rod and starboard side support removed.
Date: 10/22/2013
Views: 5568
|
|
|
|
IMG_7290
Bonded in the foam and cork support for the "ledge" at the front of the tank.
Date: 02/14/2014
Views: 5161
|
|
|
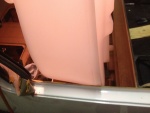
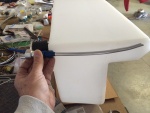
IMG_7712
Door sill repaired.
Date: 05/04/2014
Views: 6623
|
|
|
|
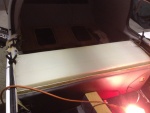
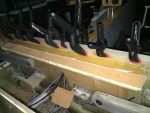
IMG_7393
Shot bags (25 lbs each) to hold the top in place for the final bonding. 2 plies of fiberglass over a micro filler in the cut.
Date: 03/01/2014
Views: 5183
|
|
|
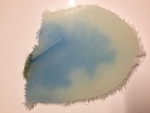
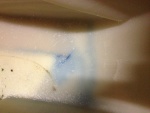
IMG_6975
The crack as viewed from the underside. it is about 1 5/8 in (4 cm) long and 1/32 in (1 mm) wide. Notice the blue staining on the underside surface.
Date: 10/19/2013
Views: 6317
|
|
|
|
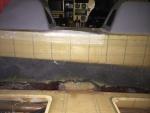
IMG_7226
Here the urethane on the aluminum ledge has also been covered with cork. The cork both served to protect the tank and the urethane.
Date: 01/19/2014
Views: 4995
|
|
|
IMG_7383
Port fuel outlet . There was one small leak on the outlet to the fuel selector. I had wrenches ready, just in case, so it was easy to tighten that last bit to end the leak.
Date: 02/23/2014
Views: 4745
|
|
|
|
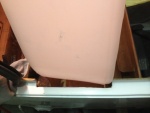
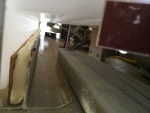
IMG_6994
Seeing where the passenger door sill will have to be cut to allow the tank to go in.
Date: 10/21/2013
Views: 5528
|
|
|
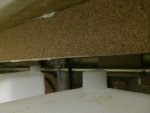
IMG_7230
It was determined that a 1/4 in (6.4 mm) thick piece of rigid urethane foam topped with cork was needed to support the front "ledge" of the tank so it wouldn't sag.
Date: 01/26/2014
Views: 6394
|
|
|
|
IMG_7374
The filtering funnel keeps crap out of the fuel tank
Date: 02/22/2014
Views: 4324
|
|
|
IMG_6971
The top of the old tank exposed. At this point the rotary tool was used to attack the old tank.
Date: 10/18/2013
Views: 4774
|
|
|
|
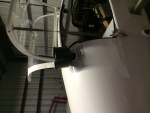
IMG_6855
But I can't get it past the entrance to the tank. Looks like I'll have to tear into things.
Date: 10/01/2013
Views: 5230
|
|
|
IMG_7231
One final check to make sure everything fits and supports the tank.
Date: 01/26/2014
Views: 5261
|
|
|
|
IMG_7281
This picture illustrates how the new vent will be installed to obtain the best venting possible within the limits of the tank.
Date: 02/13/2014
Views: 5611
|
|
|
IMG_7235
A strip being bonded to the front wall.
Date: 01/31/2014
Views: 5201
|
|
|
|
IMG_6972
Standing on the port side looking down into the tank. The leak is that blue line with the lighter blue background.
Date: 10/18/2013
Views: 4632
|
|
|
IMG_6976
At this point all that's left is that portion of the tank which was bonded to the back of the back rest.
Date: 10/19/2013
Views: 4728
|
|