|
|
IMG_1284ann
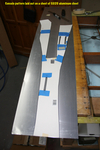
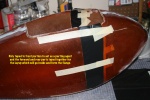
Cut a piece of aluminum for the console cover. Laid out the pattern on the aluminum sheet and traced around it.
Date: 03/30/2011
Views: 4328
|
|
|
IMG_1285ann
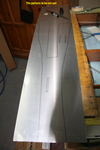
The tracing for the cover cut out.
Date: 03/30/2011
Views: 4095
|
|
|
|
IMG_1287ann
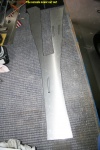
The console cover cut out. Now I have to figure out how to make the cuts for the slots for the brake levers and parking brake. Later there will be cutouts for the flap and trim switches as well as the brake reservoir.
Date: 03/30/2011
Views: 5322
|
|
|
IMG_1275ann
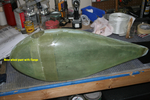
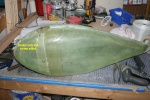
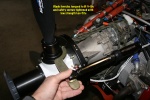
2011 03 29 Weather has turned cold again. No hanger work for a few days. Working in the shop on the wheel pants. The nose gear pant with mounting flange for the front piece
Date: 03/29/2011
Views: 4756
|
|
|
|
IMG_1276ann
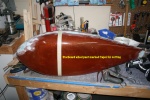
Anchor nuts and screws now hold the front on.
Date: 03/29/2011
Views: 3909
|
|
|
IMG_1277ann
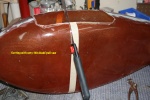
The starboard wheel pant marked with tape to show where to cut.
Date: 03/29/2011
Views: 5244
|
|
|
|
IMG_1278ann
A very thin pull saw has been used to cut the front ends off the pants.
Date: 03/29/2011
Views: 4371
|
|
|
IMG_1279ann
The pant with the front cut off
Date: 03/29/2011
Views: 4856
|
|
|
|
IMG_1280ann
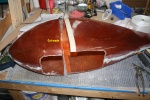
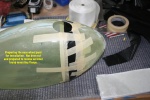
Poly has been taped over the front half. This will prevent the interior layup from sticking to the front half forming the joining flange. The front and rear have been taped together in preparation for the inner layup.
Date: 03/29/2011
Views: 4855
|
|
|
IMG_1282ann
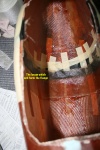
Interior view showing the layup applied.
Date: 03/29/2011
Views: 4651
|
|
|
|
IMG_1262ann
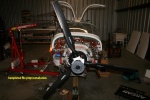
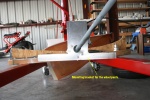
2011 03 28 Propeller has been installed.
Date: 03/28/2011
Views: 4694
|
|
|
IMG_1265ann
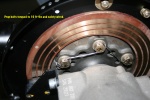
The prop bolts have been torqued to 10 ft-lbs and safety wired.
Date: 03/28/2011
Views: 4720
|
|
|
|
IMG_1266ann
Blade ferrules have been torqued to 8 ft-lbs and the retention screw tightened with low-strength Loc-Tite.
Date: 03/28/2011
Views: 4700
|
|
|
IMG_1272ann
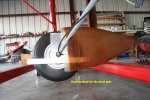
The nose wheel pant has been cut and prepared to receive inside layups to create a mounting flange.
Date: 03/28/2011
Views: 4233
|
|
|
|
IMG_1242ann
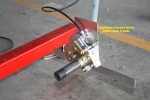
The only problem is that 1" spacers (1" sq tube) don't provide sufficient space for the caliper to move.
Date: 03/25/2011
Views: 4777
|
|
|
IMG_1239ann
Looks to need another 0.445" or so.
Date: 03/25/2011
Views: 4203
|
|
|
|
IMG_1244ann
The overall fit for the wheel pant is good. Need to make a hole and cutout to properly locate the wheel pant.
Date: 03/25/2011
Views: 4474
|
|
|
IMG_1254ann
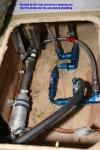
Removed one electric pump and the associated plumbing to greatly simplify the fuel system. The in-line filters were removed and replaced with the gascolator.
Date: 03/25/2011
Views: 4474
|
|
|
|
IMG_1255ann
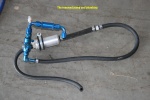
The superfluous pump and plumbing removed. In addition, I connected the flaps to the electrical power source for the main pump (not shown). This provides power to the flaps through the old pump circuit breaker path. Tested and it works fine.
Date: 03/25/2011
Views: 4477
|
|
|
IMG_1241ann
2011 03 25 Test fit of the wheel pant mounting bracket. (2nd try, BTW) This one is OK.
Date: 03/25/2011
Views: 4412
|
|