Recent Updates1. FlapDrive ... 242. DoorMount39Ann 243. DoorMount36Ann 244. DoorMount37Ann 245. TrimSwitche... 246. DoorMount26Ann 247. DoorMount27Ann 248. DoorMount28Ann ... 279. FuelFiller1...Random Images
TailplaneBearings03Date: 12/21/2003 Views: 4819 
IMG_0283AnnDate: 05/02/2008 Views: 5973 
P1010003Date: 11/29/1999 Views: 9479 Newest Image
EAA SITEDate: 08/23/2023 Views: 770682 Most Viewed Image
EAA SITEDate: 08/23/2023 Views: 770682 |
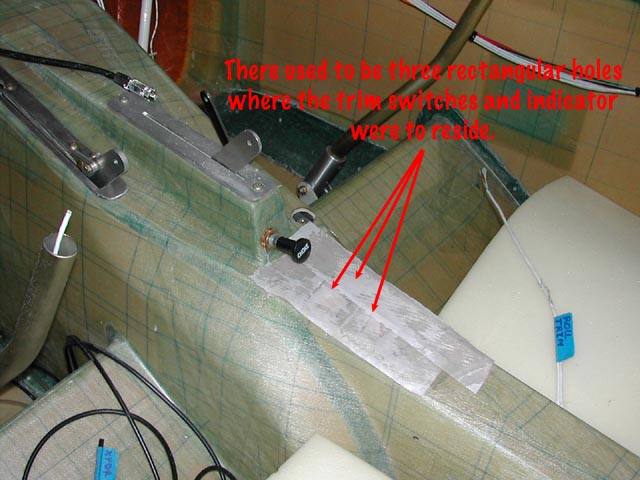
Photo Propertiessummary details
|