|
|
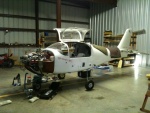
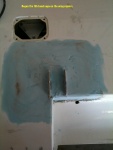
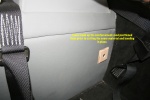
IMG_1425em
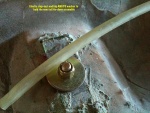
Just kind of a status photo as of 2010 12 20
Date: 12/20/2010
Views: 4941
|
|
|
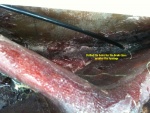
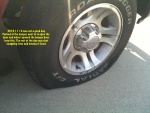
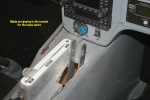
IMG_1412ann
2010 12 20 It's difficult to work in the hanger during the cold of late November and all of December. I tended to stay home and work in the shop on the "Taz" the Little Toot Sport Biplane I'm building. On the occasional nice day like this I ma
Date: 12/20/2010
Views: 5459
|
|
|
|
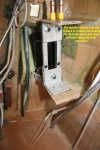
IMG_0767ann
2010 11 23 Began putting the baffle/supports back on.
Date: 11/23/2010
Views: 6436
|
|
|
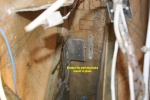
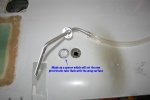
IMG_0766ann
Baffle/supports screwed down and safety wired.
Date: 11/23/2010
Views: 6650
|
|
|
|
IMG_0768ann
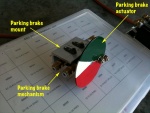
Also bonded the parking brake mount in place.
Date: 11/23/2010
Views: 6197
|
|
|
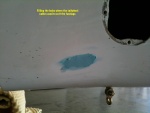
IMG_1371ann
2010 11 17 Had some leftover SuperFil from wing work so I cleaned up the holes in the tail where the old tailwheel cables exited the aft fuselage and proceeded to fill them.
Date: 11/17/2010
Views: 6511
|
|
|
|
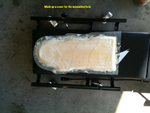
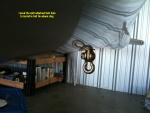
IMG_1373ann
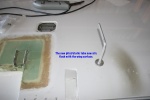
For the last several days I had been making up a cover for the monowheel hole. Here it's ready for a test fit and any adjustments necessary.
Date: 11/17/2010
Views: 6397
|
|
|
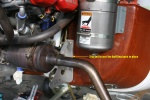
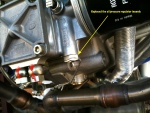
IMG_1374ann
I also received the new parts for the Rotax oil pressure regulator so I replaced them and safety wired it all back together.
Date: 11/17/2010
Views: 6516
|
|
|
|
IMG_1364ann
2010 11 13 I began the fill/sand routine on the patched areas of the wing.
Date: 11/13/2010
Views: 6074
|
|
|
IMG_1362ann
2010 11 12 Was a total waste of a day. After arriving at the hanger, I went in to open the hanger door. When the hanger door had been opened I was greeted by the sight of a drooping rear bumper on the Ranger. Went to the droopy side and found this. R
Date: 11/12/2010
Views: 13985
|
|
|
|
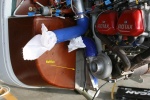
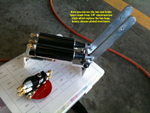
IMG_1352ann
The parking brake and master cylinder. The levers for the master cylinder have been made up from 1/4" aluminum bar stock. They replace the original, too long, too heavy, chromed steel levers that came with the unit.
Date: 11/05/2010
Views: 3805
|
|
|
IMG_1343ann
2010 11 05 Installed a tail tie-down point where the tailwheel bolt used to be.
Date: 11/05/2010
Views: 3885
|
|
|
|
IMG_1345ann
Used a big AN970 washer with an elastic stop nut to hold it all in place.
Date: 11/05/2010
Views: 4222
|
|
|
IMG_1346ann
Made up an actuator and mount for the parking brake.
Date: 11/05/2010
Views: 4564
|
|
|
|
IMG_0517ann
2010 10 26 Final installation of the pitot/static tube.
Date: 10/26/2010
Views: 3978
|
|
|
IMG_0457ann
2010 10 20 While in Florida, I had Bud go over the aircraft to see what issues he could find. One issue was the lack of spar pin reinforcements when the cockpit module was built.
Date: 10/20/2010
Views: 4582
|
|
|
|
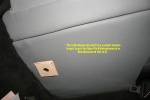
IMG_0458ann
I've gone back to the build manual and made up a pair of reinforcements. Here marking where the upholstery will be cut to make a place for them.
Date: 10/20/2010
Views: 4535
|
|
|
IMG_0455ann
Hole cut in console to accomodate the new brake levers.
Date: 10/18/2010
Views: 4683
|
|
|
|
IMG_0456ann
2010 10 18 Mounted the new brake master cylinder with clecos to establish the location and size of the hole in the console needed for the brake levers.
Date: 10/18/2010
Views: 4140
|
|
|
IMG_0454ann
2010 10 16 - Since I had to replace the pitot/static tube anyway, I decided to make up a spacer to get the mount flush with the wing surface.
Date: 10/16/2010
Views: 4372
|
|