|
|
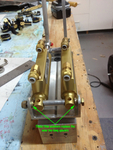
New MC-4A 11
Because the sides are narrower and closer to the ends of the MC-4A's the old outer spacers no longer fit and it would be impossible to further shorten them, they have been replaced with a couple washers.
Date: 04/15/2012
Views: 7672
|
|
|
IMG_0766ann
Baffle/supports screwed down and safety wired.
Date: 11/23/2010
Views: 7554
|
|
|
|
IMG_1235ann
2011 03 23 Preparing the first wheel pant. Used a tape strip for the cut line.
Date: 03/23/2011
Views: 7512
|
|
|
IMG_0026post
Date: 08/30/2010
Views: 7385
|
|
|
|
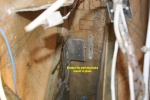
IMG_1371ann
2010 11 17 Had some leftover SuperFil from wing work so I cleaned up the holes in the tail where the old tailwheel cables exited the aft fuselage and proceeded to fill them.
Date: 11/17/2010
Views: 7349
|
|
|
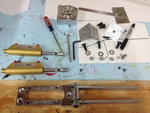
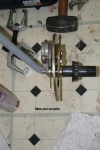
IMG_2681
2012 04 09 Well, after 4 weeks and buckets of DOT5 spent trying to make the Jaymar master cylinders work I have given up. They are just crap. So I'm taking the base of their base and building a new brake master setup using MATCO MC-4A master cylinders.
Date: 04/07/2012
Views: 7273
|
|
|
|
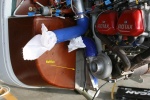
IMG_1374ann
I also received the new parts for the Rotax oil pressure regulator so I replaced them and safety wired it all back together.
Date: 11/17/2010
Views: 7260
|
|
|
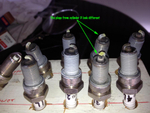
IMG_3327em
Next request was for a compression check. 80/80, 80/80, 80/80, 79/80. No problem there. But while doing this I decided to check the plugs. Cylinder #3 plugs looked different. WHY?
Date: 06/12/2012
Views: 7227
|
|
|
|
IMG_3218
Once the brakes seemed to be OK it was time to run the engine and check it out. That didn't go well. Started well, warmed up with a bit of choke at the beginning. Smoothed out nicely and idled properly after it was all warmed up. Then I added throttle
Date: 05/18/2012
Views: 7202
|
|
|
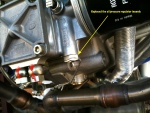
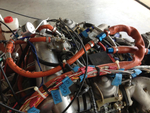
IMG_3384em
Remove the Billet pump from the circuit. Run with only electric pump. Input line connected directly to the regulator. At the same time, remove airbox pressure from differential gauge to get absolute fuel pressure out of regulator.
Date: 07/09/2012
Views: 7127
|
|
|
|
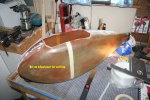
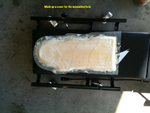
IMG_1373ann
For the last several days I had been making up a cover for the monowheel hole. Here it's ready for a test fit and any adjustments necessary.
Date: 11/17/2010
Views: 7117
|
|
|
IMG_0768ann
Also bonded the parking brake mount in place.
Date: 11/23/2010
Views: 7113
|
|
|
|
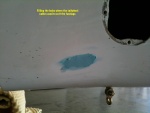
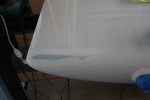
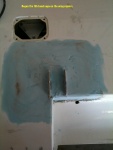
IMG_1410
Sanded down the filler on the scuffed wing tip.
Date: 05/27/2011
Views: 7094
|
|
|
IMG_3334post
Requests to check the fuel delivery system. Started with the gascolator. Any large quantity of crap in the gascolator? Here's the fuel from the gascolator in the test vessel. A tiny bit of black crud from who knows what. But not enough to cause a pro
Date: 06/13/2012
Views: 7022
|
|
|
|
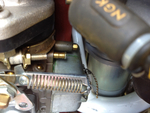
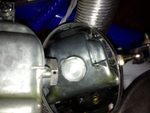
IMG_3238
Moved over to the port side and did the same with this carb.
Date: 05/21/2012
Views: 6925
|
|
|
IMG_0767ann
2010 11 23 Began putting the baffle/supports back on.
Date: 11/23/2010
Views: 6922
|
|
|
|
IMG_3278
And the float bowl back in place, with no gasket sticking out anywhere. Then it was torqued down and safety wired. Both drip trays were then re-installed. Lastly, I ran the electric fuel pump for several minutes (at 6 PSI according to the gage) and che
Date: 05/30/2012
Views: 6895
|
|
|
IMG_1364ann
2010 11 13 I began the fill/sand routine on the patched areas of the wing.
Date: 11/13/2010
Views: 6786
|
|
|
|
IMG_0203post
Date: 09/08/2010
Views: 6764
|
|
|
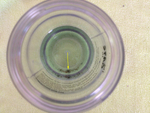
IMG_3392
Differential pressure with engine running on electric pump: 3.8 lbs
Date: 07/09/2012
Views: 6733
|
|