|
|
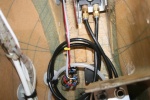
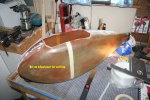
IMG_1415
Continuing work on the brake plumbing. And the usual wheel pants and gear leg fairing work.
Date: 05/28/2011
Views: 6062
|
|
|
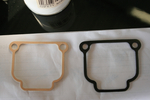
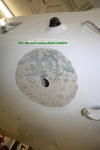
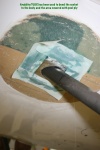
IMG_2598
The culprit seems to be the compressed paper gasket material which dries out if it sits for a while and then leaks. Cork gaskets were recommended as a replacement. Unfortunately, cork gaskets were not available. So I did a Google search and came up wi
Date: 05/30/2012
Views: 6040
|
|
|
|
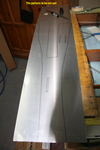
IMG_1285ann
The tracing for the cover cut out.
Date: 03/30/2011
Views: 4104
|
|
|
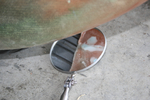
IMG_1303
Fitting the wheel pants. Here, I'm using a mirror to see where the tire rubs on the opening so I can mark areas to relieve.
Date: 04/14/2011
Views: 4731
|
|
|
|
IMG_0048post
Date: 09/01/2010
Views: 4430
|
|
|
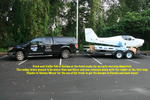
IMG_0266ann
2010 09 14 - The aircraft on the trailer at the hotel ready for an early morning departure. The brace on the rudder proved to be a negative and was removed at the first stop. The rudder was also removed and strapped to the trailer. Thanks to Tommy Meye
Date: 09/14/2010
Views: 4219
|
|
|
|
IMG_0038post
Date: 09/01/2010
Views: 5742
|
|
|
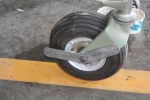
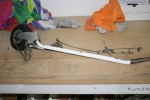
IMG_1477p
started on the nose wheel and strut. Made brackets for the wheel pant.
Date: 06/08/2011
Views: 4995
|
|
|
|
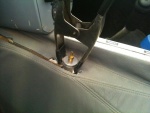
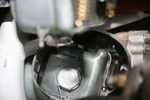
IMG_1668
Began fitting the brake fluid reservoir.
Date: 04/13/2011
Views: 5037
|
|
|
IMG_0031post
Date: 08/30/2010
Views: 4744
|
|
|
|
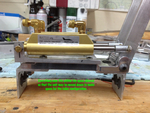
New MC-4A 12
The whole assembly should now fit, length and width, within the existing space. So the unit may be dropped down as needed to allow for it being taller. Due to outside commitments, it looks like it will be Wednesday (18th) before I can get to the hanger
Date: 04/15/2012
Views: 5363
|
|
|
IMG_0454ann
2010 10 16 - Since I had to replace the pitot/static tube anyway, I decided to make up a spacer to get the mount flush with the wing surface.
Date: 10/16/2010
Views: 4605
|
|
|
|
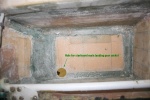
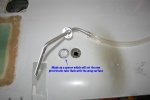
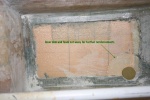
IMG_2604
Got out the inspection mirror and made sure the gasket was in place all the way round the bowl. It was.
Date: 05/30/2012
Views: 8016
|
|
|
IMG_0130post
Date: 09/03/2010
Views: 3937
|
|
|
|
IMG_0055post
Date: 09/01/2010
Views: 5105
|
|
|
IMG_0026post
Date: 08/30/2010
Views: 7385
|
|
|
|
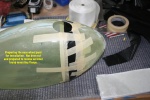
IMG_1235ann
2011 03 23 Preparing the first wheel pant. Used a tape strip for the cut line.
Date: 03/23/2011
Views: 7512
|
|
|
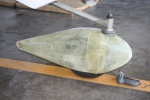
IMG_1272ann
The nose wheel pant has been cut and prepared to receive inside layups to create a mounting flange.
Date: 03/28/2011
Views: 4242
|
|
|
|
IMG_1486p
Nose
Date: 06/10/2011
Views: 4417
|
|
|
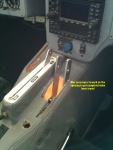
IMG_1590ann
Had to adjust the opening for the brake handles to allow for full and free travel.
Date: 03/15/2011
Views: 6032
|
|