|
|
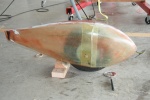
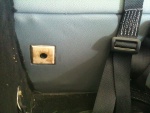
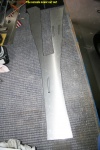
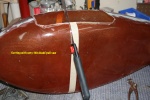
IMG_1305
Outside fitting
Date: 04/14/2011
Views: 4637
|
|
|
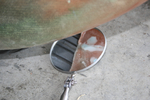
IMG_1303
Fitting the wheel pants. Here, I'm using a mirror to see where the tire rubs on the opening so I can mark areas to relieve.
Date: 04/14/2011
Views: 4397
|
|
|
|
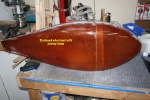
IMG_1299
Began the process of making up mounts for the wheel pants.
Date: 04/11/2011
Views: 4620
|
|
|
IMG_1300
Test mount for the wheel pants.
Date: 04/11/2011
Views: 5060
|
|
|
|
IMG_1301
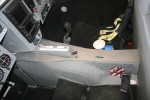
Test fit of the console cover.
Date: 04/11/2011
Views: 6243
|
|
|
IMG_1667
This had not been done on my quick build cockpit module. Next will be to add the two plies of BID.
Date: 04/13/2011
Views: 4374
|
|
|
|
IMG_1668
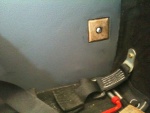
Began fitting the brake fluid reservoir.
Date: 04/13/2011
Views: 4747
|
|
|
IMG_1669
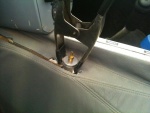
Evaluating how the reservoir will be mounted/attached.
Date: 04/13/2011
Views: 4447
|
|
|
|
IMG_1666
Bonded the bushing reinforcements onto the cockpit module bushings
Date: 04/13/2011
Views: 4486
|
|
|
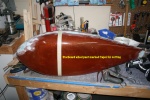
IMG_1283ann
The starboard wheel pant with all the tape and poly removed. Almost ready for anchor nuts and screws. Unfortunately, I left one area of the flange too thing and had to add small pieces of glass. Tomorrow will be anchor nut day for it.
Date: 03/30/2011
Views: 4461
|
|
|
|
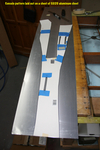
IMG_1284ann
Cut a piece of aluminum for the console cover. Laid out the pattern on the aluminum sheet and traced around it.
Date: 03/30/2011
Views: 4077
|
|
|
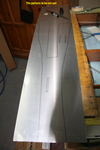
IMG_1285ann
The tracing for the cover cut out.
Date: 03/30/2011
Views: 3830
|
|
|
|
IMG_1287ann
The console cover cut out. Now I have to figure out how to make the cuts for the slots for the brake levers and parking brake. Later there will be cutouts for the flap and trim switches as well as the brake reservoir.
Date: 03/30/2011
Views: 5035
|
|
|
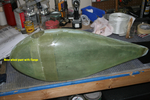
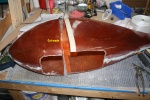
IMG_1275ann
2011 03 29 Weather has turned cold again. No hanger work for a few days. Working in the shop on the wheel pants. The nose gear pant with mounting flange for the front piece
Date: 03/29/2011
Views: 4528
|
|
|
|
IMG_1276ann
Anchor nuts and screws now hold the front on.
Date: 03/29/2011
Views: 3640
|
|
|
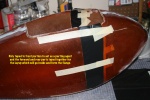
IMG_1277ann
The starboard wheel pant marked with tape to show where to cut.
Date: 03/29/2011
Views: 4967
|
|
|
|
IMG_1278ann
A very thin pull saw has been used to cut the front ends off the pants.
Date: 03/29/2011
Views: 4134
|
|
|
IMG_1279ann
The pant with the front cut off
Date: 03/29/2011
Views: 4565
|
|
|
|
IMG_1280ann
Poly has been taped over the front half. This will prevent the interior layup from sticking to the front half forming the joining flange. The front and rear have been taped together in preparation for the inner layup.
Date: 03/29/2011
Views: 4595
|
|
|
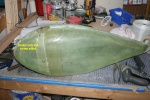
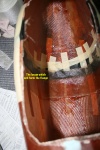
IMG_1282ann
Interior view showing the layup applied.
Date: 03/29/2011
Views: 4372
|
|