|
|
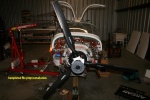
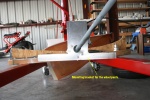
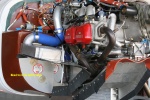
IMG_1262ann
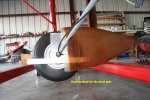
2011 03 28 Propeller has been installed.
Date: 03/28/2011
Views: 4435
|
|
|
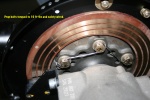
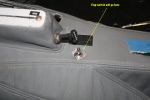
IMG_1265ann
The prop bolts have been torqued to 10 ft-lbs and safety wired.
Date: 03/28/2011
Views: 4468
|
|
|
|
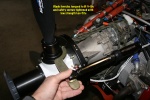
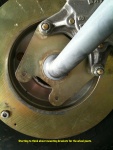
IMG_1266ann
Blade ferrules have been torqued to 8 ft-lbs and the retention screw tightened with low-strength Loc-Tite.
Date: 03/28/2011
Views: 4450
|
|
|
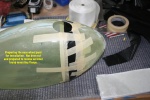
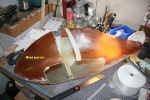
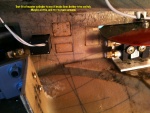
IMG_1272ann
The nose wheel pant has been cut and prepared to receive inside layups to create a mounting flange.
Date: 03/28/2011
Views: 3952
|
|
|
|
IMG_1242ann
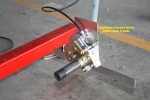
The only problem is that 1" spacers (1" sq tube) don't provide sufficient space for the caliper to move.
Date: 03/25/2011
Views: 4498
|
|
|
IMG_1239ann
Looks to need another 0.445" or so.
Date: 03/25/2011
Views: 3904
|
|
|
|
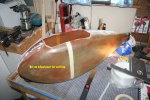
IMG_1244ann
The overall fit for the wheel pant is good. Need to make a hole and cutout to properly locate the wheel pant.
Date: 03/25/2011
Views: 4213
|
|
|
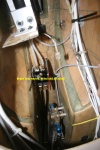
IMG_1254ann
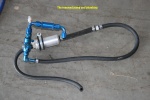
Removed one electric pump and the associated plumbing to greatly simplify the fuel system. The in-line filters were removed and replaced with the gascolator.
Date: 03/25/2011
Views: 4236
|
|
|
|
IMG_1255ann
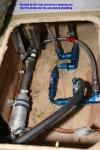
The superfluous pump and plumbing removed. In addition, I connected the flaps to the electrical power source for the main pump (not shown). This provides power to the flaps through the old pump circuit breaker path. Tested and it works fine.
Date: 03/25/2011
Views: 4243
|
|
|
IMG_1241ann
2011 03 25 Test fit of the wheel pant mounting bracket. (2nd try, BTW) This one is OK.
Date: 03/25/2011
Views: 4183
|
|
|
|
IMG_1236ann
Cut along the tape strip.
Date: 03/23/2011
Views: 4568
|
|
|
IMG_1235ann
2011 03 23 Preparing the first wheel pant. Used a tape strip for the cut line.
Date: 03/23/2011
Views: 7212
|
|
|
|
IMG_1222ann
2011 03 18 Received my Poly-Flow brake line. It's more flexible than the other stuff. It can be routed to suit. All the brake system needs is the new reservoir and it can be filled/bled.
Date: 03/18/2011
Views: 4341
|
|
|
IMG_1226ann
Finally got the baffle mounted. Only now I see I need to re-do the safety wiring.
Date: 03/18/2011
Views: 4098
|
|
|
|
IMG_1227ann
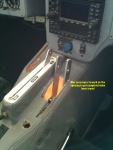
This is where the flap switch will reside.
Date: 03/18/2011
Views: 4425
|
|
|
IMG_1229ann
This is the wiring on the flap switch. No power connections yet.
Date: 03/18/2011
Views: 4228
|
|
|
|
IMG_1591ann
Starting to think about mounting brackets for the wheel pants.
Date: 03/15/2011
Views: 4141
|
|
|
IMG_1587ann
2011 03 13 Looking to see how all the brake lines will fit.
Date: 03/15/2011
Views: 3907
|
|
|
|
IMG_1589ann
I need to get two brake lines and a reservoir line in there and attached somehow.
Date: 03/15/2011
Views: 4870
|
|
|
IMG_1590ann
Had to adjust the opening for the brake handles to allow for full and free travel.
Date: 03/15/2011
Views: 5732
|
|