Jeff_1
Jeff Roberts fuel tank repair 1.
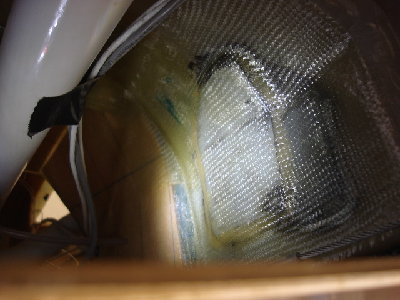
"For those of you that we're wanting to hear the out come of this
subject below is a picture of the repair. I drilled the ends of the
crack. Then rubbed pro-seal into the crack as much as I could. No way
of telling how much if any went in. I then covered the area with the
gooey stuff. "Yuck what a mess". After shaping it for the angle of the
tunnel, I then placed a patch of old tank John Lawton sent me over the
crack with pro-seal on it as well. I kept pressure on it for 2 days as
it set up. Then I sanded the area with 80 grit and laid up a 6 inch, 3
layer patch of bid over the whole thing. Probably over kill but I now
have the piece of mind of knowing If the pro seal ever gave out
(Unheard of) the bid would hold till another repair or a replacement of
the tank. To hopefully help this from happening again I placed two 1
inch foam pads under the tank between the floor and the tank on both
sides. I guess as long as the tank is glassed in it can still happen
but oh well."
"The pro-seal can be found on this page.
http://www.aircraftspruce.com/search/search.php"
Y9-07-25
|
Full size:
400x300
|