|
|
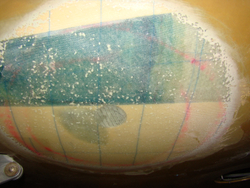
20141102_161049
20141102_161049.jpg
Date: 11/02/2014
Views: 33670
|
|
|
dsc08626
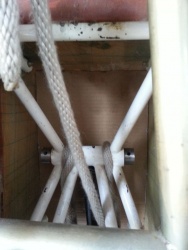
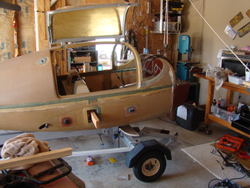
Put in a 2x4 in the main wing spar tunnel and located the pins. This was only used to aid in keeping the plane from tipping.
Date: 04/14/2012
Views: 33125
|
|
|
|
dsc08625
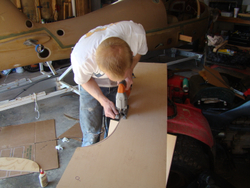
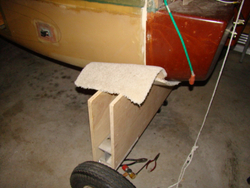
Cutting out one of the ribs for the airframe. Going to use the mono trailer as the foundation of the jig. This will make is easy to level the airframe when getting ready for the trr-gear conversion. How do you like my work bench?
Date: 04/14/2012
Views: 32560
|
|
|
20141102_152814
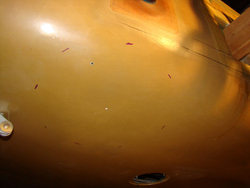
Drilling out the screw. It would move. I'm removing this plate to patch later.
Date: 11/02/2014
Views: 30965
|
|
|
|
dsc08627
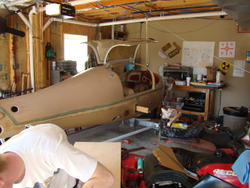
The monowheel landing gear is in the up position and resting on the main wheel with some of the weight held by the block and tackle. This was taken just before putting on the braces to keep her from rolling. Been trying to get rid of that tv in the back
Date: 04/14/2012
Views: 30042
|
|
|
dsc08642
From the start the airframe was sitting 2.5 deg tail low and 0.1 deg to port. Not bad for just putting her on there. I jacked up the back of the trailer to get it as near to 0.0 as possible and also shifted the airframe latterly to turn that .1 to 0.0 a
Date: 04/15/2012
Views: 28032
|
|
|
|
nex_2014_01_25_35
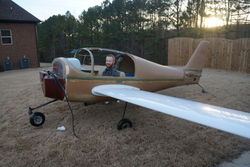
Dont judge me! You know you do it too. Anyways, was trying to see if my weight would cause the nose to come down. As you can see she likes being a tail dragger.
Date: 01/26/2014
Views: 26762
|
|
|
dsc08664
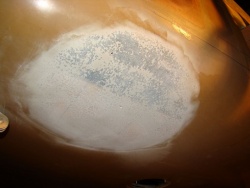
The gell coat really gums up the sand paper. Still a bit more to remove.
Date: 04/22/2012
Views: 25688
|
|
|
|
dsc08662
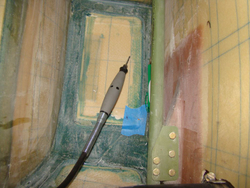
The 10“ diameter from the pilot hole.
Date: 04/22/2012
Views: 25413
|
|
|
dsc08639
More of the same. I was going to cut the carpet and form it to the ribs and staple it in place but decided that was just a time vampire and pointless since the airframe is holding it in place.
Date: 04/15/2012
Views: 24946
|
|
|
|
nex_2014_01_25_32
nex_2014_01_25_32.jpg
Date: 01/26/2014
Views: 24885
|
|
|
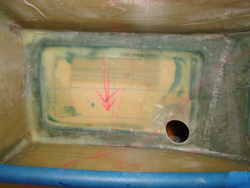
dsc08661
Locating the center of the main gear hole. Used a pilot to be used to measure out the 10“ diameter on the bottom.
Date: 04/22/2012
Views: 24765
|
|
|
|
dsc08628
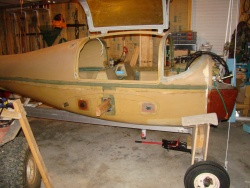
Nic pic of the plane! If Bill would move his head out of the way! Notice I'm using a bungee cord to hold the doors open.
Date: 04/14/2012
Views: 24117
|
|
|
dsc08640
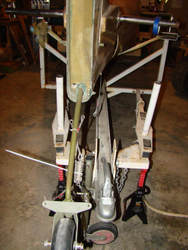
OK not the best shot but here you can see I used the jack to move the rear rib in place under the airframe being careful not to pinch the belly. I then secured the rib in place but using some drywall screws in the 2x6. This way any weight will be transf
Date: 04/15/2012
Views: 24043
|
|
|
|
nex_2014_01_25_31
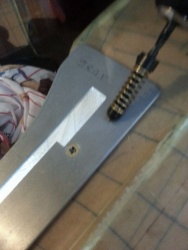
Starboard side, need to trim the bolt.
Date: 01/26/2014
Views: 24032
|
|
|
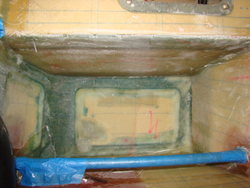
dsc08961
Stb side two layers bid 10" and 8" peel ply removed
Date: 10/01/2012
Views: 23620
|
|
|
|
dsc08960
Stb side after layups and peel ply removed.
Date: 10/01/2012
Views: 22866
|
|
|
dsc08629
In a few mins she will no longer be a monowheel :-(
Date: 04/14/2012
Views: 22662
|
|
|
|
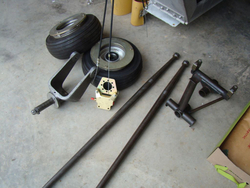
dsc08602
Landing gear parts. The nose gear leg is having MOD 53 performed on it at my fauther in-laws.
Date: 04/10/2012
Views: 22605
|
|
|
dsc08965
Port side after layups and peel ply removed. Notice shape of hole for the angle of the LG socket. I wrapped the LG socket with sandpaper and used it to form the hole.
Date: 10/01/2012
Views: 22417
|
|