|
|
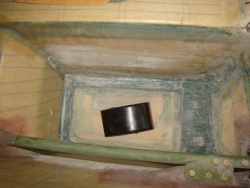
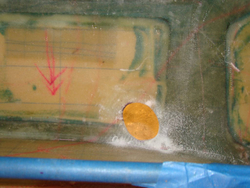
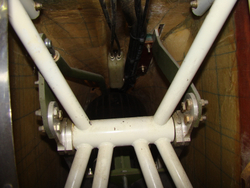
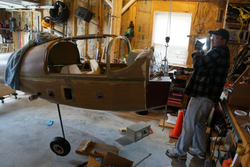
dsc08962
Stb side. Need to do some clean up...
Date: 10/01/2012
Views: 22381
|
|
|
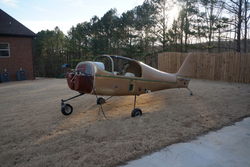
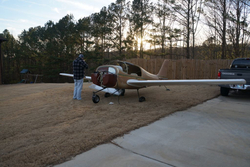
nex_2014_01_25_17
Rolled out on the grass. Notice the tail wheel is still there. I left it in due to not having the stacks of cash to hold the nose down.
Date: 01/26/2014
Views: 22377
|
|
|
|
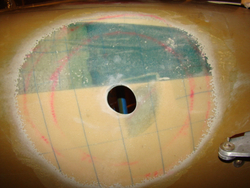
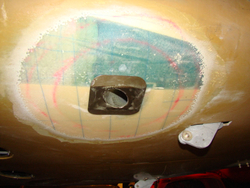
dsc08966
Port side LG socket hole.
Date: 10/01/2012
Views: 22330
|
|
|
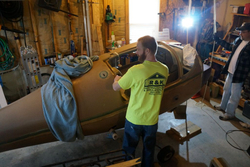
2012-08-18_19-58-42_666
Port side. Same area as before just without the flash. Backlit from the inside to show areas with less material. This is before I did the belly layup per the manual.
Date: 08/19/2012
Views: 22213
|
|
|
|
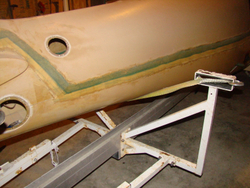
dsc08607
Starting to prep the bays for the tri-gear conversion.
Date: 04/10/2012
Views: 22060
|
|
|
nex_2014_01_25_28
Wings on. Not really required at the stage. Just had to do it for motivation.
Date: 01/26/2014
Views: 21859
|
|
|
|
dsc08641
Was going to use another plywood rib here but decided that the wide strap works fine. I later added some foam to the strap to give it some padding.
Date: 04/15/2012
Views: 21775
|
|
|
dsc09022
Here you see I used bondo on the shims and screwed them down into the block. The shims made sure the guide was level. Also note the hole drilled in the Aluminum angle and the shim. This is where I fixed the guide for the curing stage to ensure nothing
Date: 01/22/2013
Views: 21746
|
|
|
|
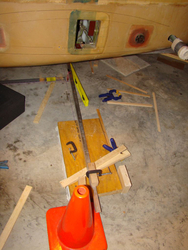
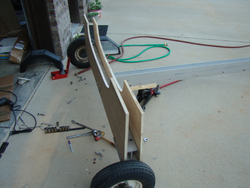
dsc09018
Started to make the axle jig. Used a simple setup of first taking large flat blocks of wood and caulking it to the floor somewhere over FS70. Then that allows me to fix the aluminum angle with a single screw once in its final position.
Date: 01/10/2013
Views: 21450
|
|
|
dsc09024
I was really anal about keeping the socket holes tight. This proved to be more work than it was worth and was fighting the tight fit when it came to locating the axles. Do yourself a favor and just make them a little bigger, 1/8 or so. This gap will be
Date: 01/22/2013
Views: 21363
|
|
|
|
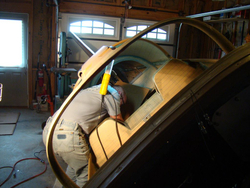
dsc09045
Uncle Kim at work. We would tilt to starboard to work on the port side vice versa.
Date: 01/23/2013
Views: 21317
|
|
|
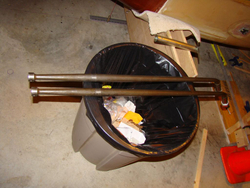
dsc09019
Trash can is the best way to hold the landing gear legs.
Date: 01/10/2013
Views: 21156
|
|
|
|
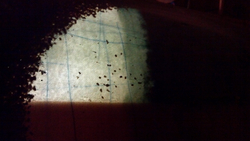
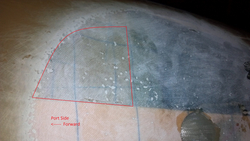
2012-08-18_19-58-15_689
Port side. Red highlighted area shows area with little reinforcement on inside. This is before I did the belly layup per the manual.
Date: 08/19/2012
Views: 21150
|
|
|
dsc08630
Though this was a neat pic of the mono wheel in the retracted position.
Date: 04/14/2012
Views: 21119
|
|
|
|
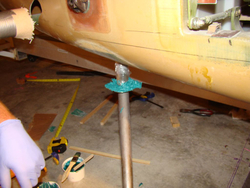
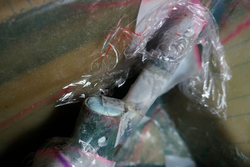
dsc09028
Here the axles are getting the green goop. I used car carnauba wax as a release agent. Worked well jut get it on there thick. We also wrapped the top of the sockets with glad wrap to keep contaminates off of it while we moved it around.
Date: 01/22/2013
Views: 21013
|
|
|
nex_2014_01_25_02
Starboard side of the air bubble fix on rib one. Used Flox with aeroboxy as a fillit.
Date: 01/25/2014
Views: 20953
|
|
|
|
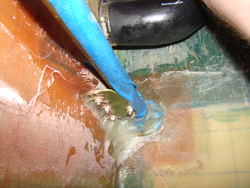
dsc08963
Port side. LG socket fitting.
Date: 10/01/2012
Views: 20858
|
|
|
nex_2014_01_25_04
Bill helping hoist the aircraft up to remove the jig.
Date: 01/25/2014
Views: 20797
|
|
|
|
nex_2014_01_25_07
What a mess.
Date: 01/25/2014
Views: 20742
|
|
|
dsc08634
OK now that the plane is off the trailer and on its own wheel we were able to remove most of the trailer hardware and position the ribs. We also used the main bolts to hold the first rib in place. The other rib was left a little lower to be located once
Date: 04/15/2012
Views: 20724
|
|