|
|
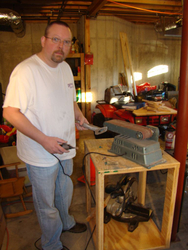
dsc09023
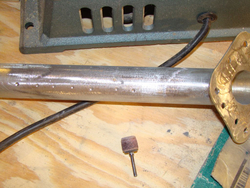
Ensure you have a good key. I used the drill press to create the dimples. These will be filled with 420 and flox when doing the glass layups.
Date: 01/22/2013
Views: 20689
|
|
|
dsc08967
Little clean up required on Port side.
Date: 10/01/2012
Views: 20512
|
|
|
|
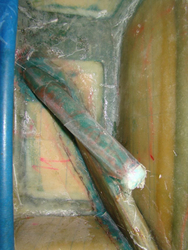
dsc08964
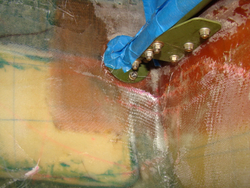
Port side. Fitting of LG socket.
Date: 10/01/2012
Views: 20433
|
|
|
nex_2014_01_25_05
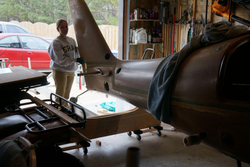
My lovely bride helping us out. Notice the jig is the mono wheel trailer.
Date: 01/25/2014
Views: 20296
|
|
|
|
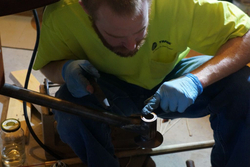
dsc09020
Bill helping by putting a good key on the sockets.
Date: 01/22/2013
Views: 20266
|
|
|
nex_2014_01_25_16
nex_2014_01_25_16.jpg
Date: 01/25/2014
Views: 20255
|
|
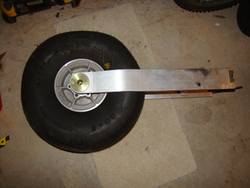
|
|
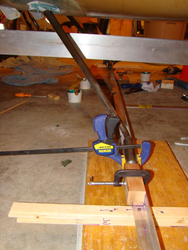
dsc09029
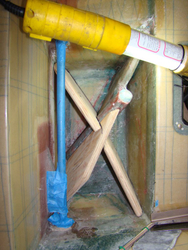
Gear legs clamped in place, no toe in/out per Bud. You cant see it in the photo but I used a green tip .30 bullet as a homemade plum bob that was attached to dead center of the aluminum angle. This helped us keep the guide over the center line. Oh make
Date: 01/22/2013
Views: 20252
|
|
|
dsc09037
Making a template for rib 2. Do yourself a favor and do not use the templates in the manual you will end up waisting your plywood, just make your own.
Date: 01/23/2013
Views: 20250
|
|
|
|
dsc09066
Port side peel ply removed. Oh notice the caps in the sockets. What I did was take a block of foam and push it down in the socket, then took it back out and covered it with car wax. Once all the ribs are in I'll see how it worked.
Date: 01/25/2013
Views: 20177
|
|
|
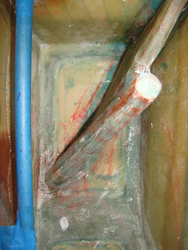
dsc09040
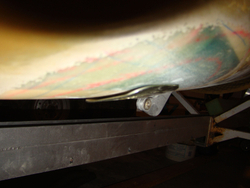
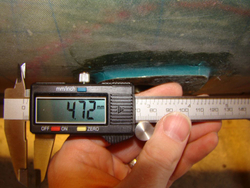
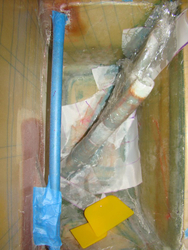
The gap from the bottom of the socket and the belly is as you see. The only way to get it all the way down was to lower the belly to 15" which was not considered an option. Belly hight is 16.0" with the axle width at 82.50" and axle cent
Date: 01/23/2013
Views: 20148
|
|
|
|
dsc09021
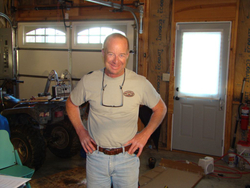
BIG THANK YOU to my Uncle Kim Prout for flying out to help me with getting the gear legs set. He also helped me slow down and plan ahead. As an excited new builder its easy to get in a rush to try achieve something tangible. Im sure after that week of b
Date: 01/22/2013
Views: 20049
|
|
|
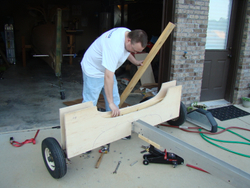
dsc09038
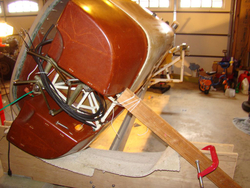
To make our backs happy and life 1000% easier we tilted the fuselage. Notice I used my monowheel trailer as a jig. A tow strap 4" wide was used in the rear to hold the tail. This was rock solid.
Date: 01/23/2013
Views: 19996
|
|
|
|
nex_2014_01_25_03
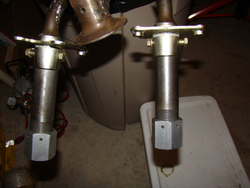
Port side dirty work. Just test fitting final install with all hardware will be after the legs are painted.
Date: 01/25/2014
Views: 19982
|
|
|
dsc08637
The mono wheel has been removed. Sad to see never used parts coming off the plane.
Date: 04/15/2012
Views: 19964
|
|
|
|
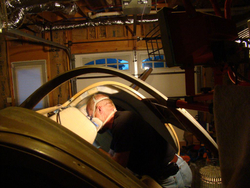
dsc09072
Here is a shot of the working angle. This was so much better than leaning over the edge. Kim's idea. Notice the heater behind Kim, this was key to keeping the temps even though the temps outside were in the 40's.
Date: 01/26/2013
Views: 19940
|
|
|
dsc08636
Here is Bill placing in some 2x6's to act as a support for the rear rib. The I-beam is 3 inches wide so the 2x6 fit perfectly. I'll explain later how those come into play.
Date: 04/15/2012
Views: 19922
|
|
|
|
dsc09065
Stbd side peel ply removed.
Date: 01/25/2013
Views: 19921
|
|
|
dsc09068
Seeing how ribs 2,3,4 line up. Get a belt sander 4x36, you'll be glad you did. Mine is from Harbor Freight.
Date: 01/25/2013
Views: 19904
|
|
|
|
dsc09049
Layup Port side complete with peel ply. Notice the glad wrap to keep air from getting under the peel ply. 420 = 46g, aeropoxy ~ 200g
Date: 01/24/2013
Views: 19831
|
|
|
dsc09070
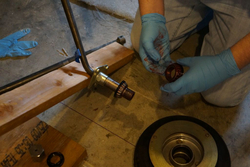
While the layups are curing we stared work on the axles. Had to ream out the holes forMG02.
Date: 01/25/2013
Views: 19750
|
|