| Quantity |
Item |
Type |
Remove |
|
|
|
-
Title:
dsc08617
-
Summary:
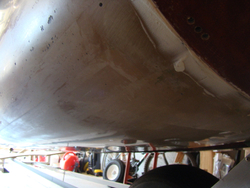
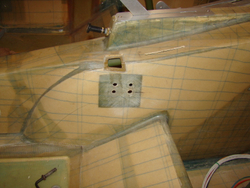
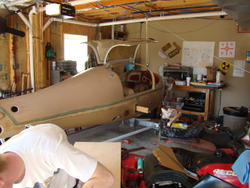
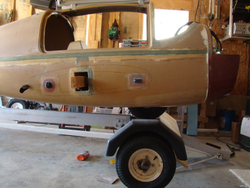
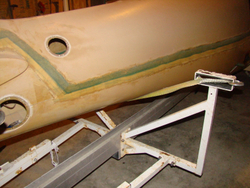
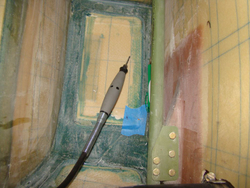
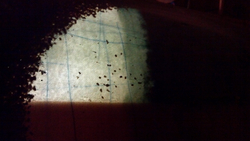
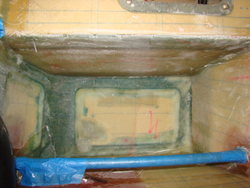
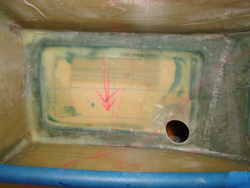
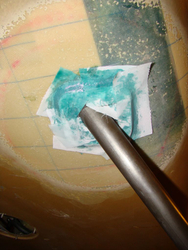
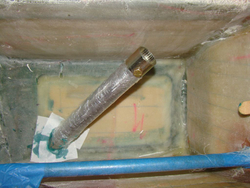
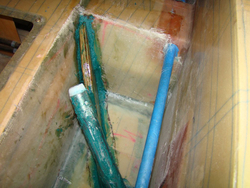
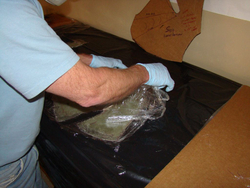
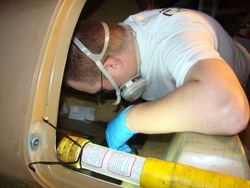
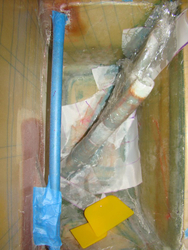
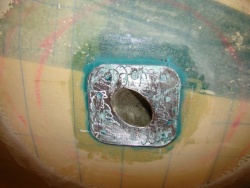
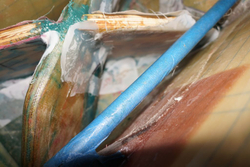
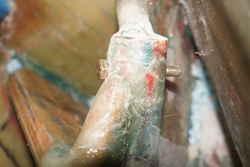
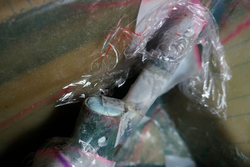
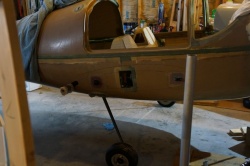
After removing the green tape.
|
Photo
|
|
|
|
|
-
Title:
dsc08618
-
Summary:
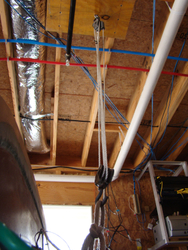
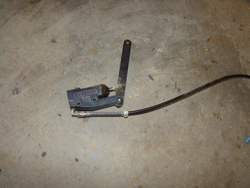
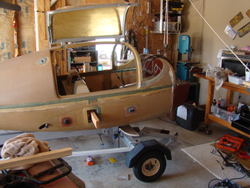
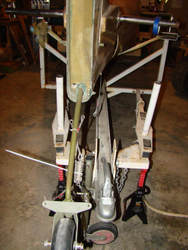
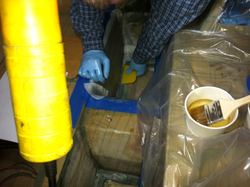
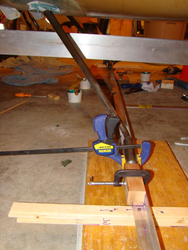
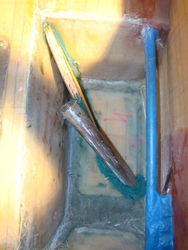
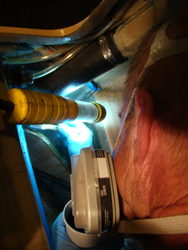
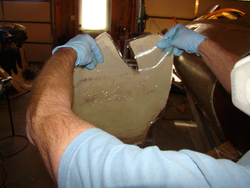
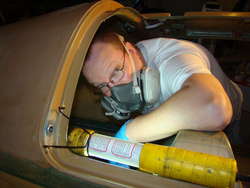
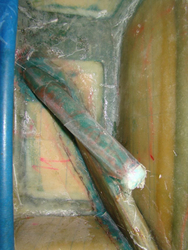
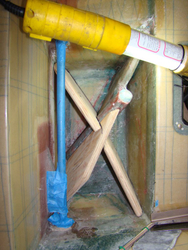
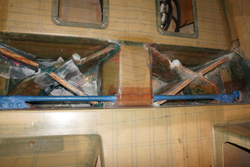
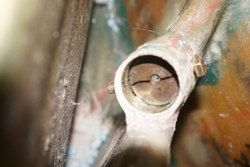
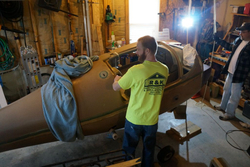
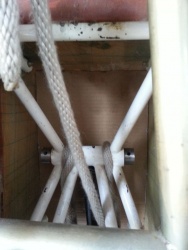
Block and tackle used to hoist the front of the aircraft to aid in creating a jig. This hoist reduces the weight to 25%.
|
Photo
|
|
|
|
|
-
Title:
dsc08619
-
Summary:
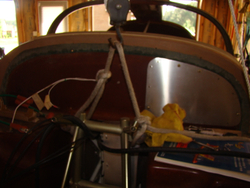
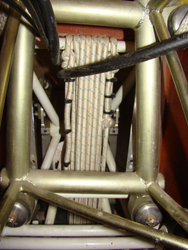
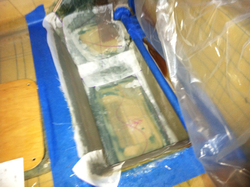
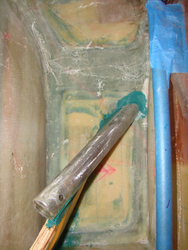
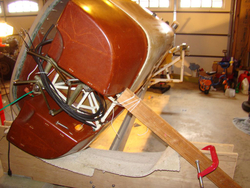
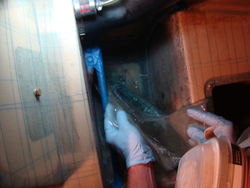
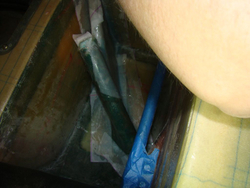
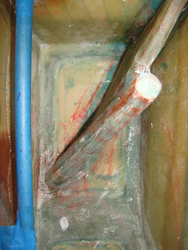
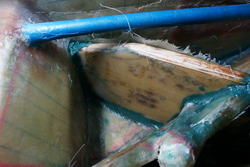
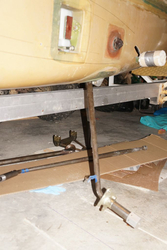
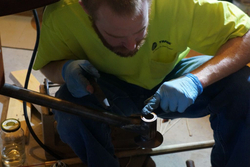
Roap tied to the engine mount frame to hoist the airframe.
|
Photo
|
|
|
|
|
-
Title:
dsc08620
-
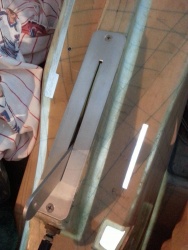
Summary:
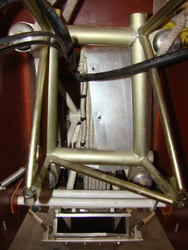
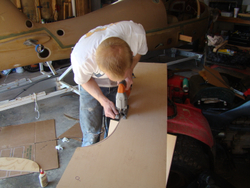
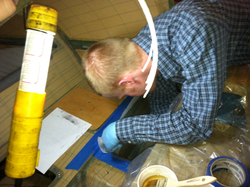
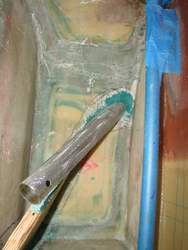
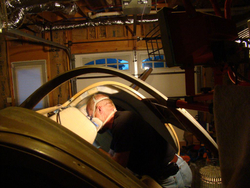
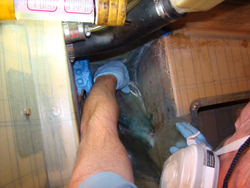
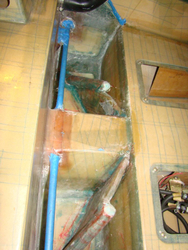
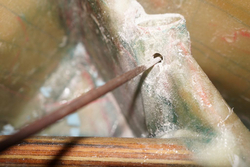
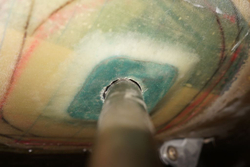
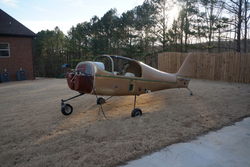
Removal of the mono firewall.
|
Photo
|
|
|
|
|
-
Title:
dsc08621
-
Summary:
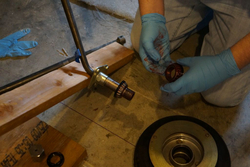
Removal of the brake master for the mono.
|
Photo
|
|
|
|
|
-
Title:
dsc08622
-
Summary:
Removed.
|
Photo
|
|
|
|
|
-
Title:
dsc08623
-
Summary:
bungee cord removal.
|
Photo
|
|
|
|
|
-
Title:
dsc08625
-
Summary:
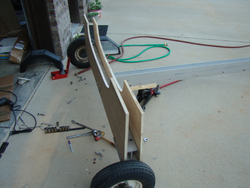
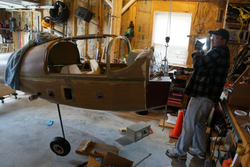
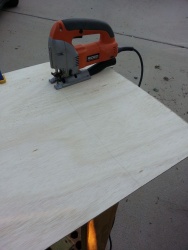
Cutting out one of the ribs for the airframe. Going to use the mono trailer as the foundation of the jig. This will make is easy to level the airframe when getting ready for the trr-gear conversion. How do you like my work bench?
|
Photo
|
|
|
|
|
-
Title:
dsc08626
-
Summary:
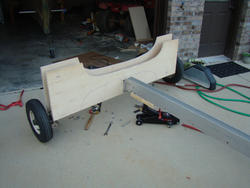
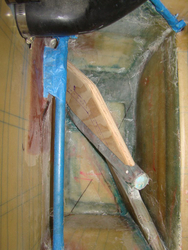
Put in a 2x4 in the main wing spar tunnel and located the pins. This was only used to aid in keeping the plane from tipping.
|
Photo
|
|
|
|
|
-
Title:
dsc08627
-
Summary:
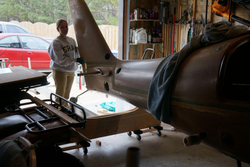
The monowheel landing gear is in the up position and resting on the main wheel with some of the weight held by the block and tackle. This was taken just before putting on the braces to keep her from rolling. Been trying to get rid of that tv in the back
|
Photo
|
|
|
|

|
-
Title:
dsc08628
-
Summary:
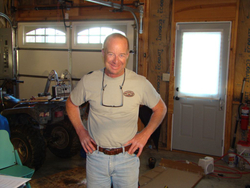
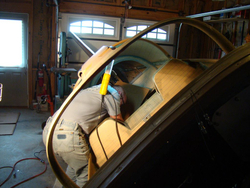
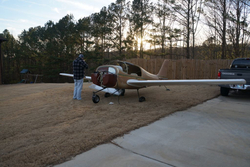
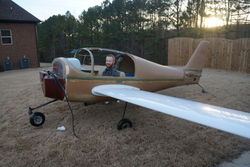
Nic pic of the plane! If Bill would move his head out of the way! Notice I'm using a bungee cord to hold the doors open.
|
Photo
|
|
|
|

|
-
Title:
dsc08629
-
Summary:
In a few mins she will no longer be a monowheel :-(
|
Photo
|
|
|
|
|
-
Title:
dsc08630
-
Summary:
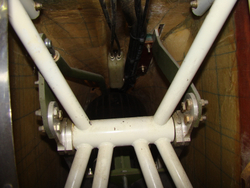
Though this was a neat pic of the mono wheel in the retracted position.
|
Photo
|
|
|
|
|
-
Title:
dsc08631
-
Summary:
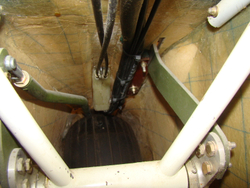
More of the same.
|
Photo
|
|
|
|
|
-
Title:
dsc08633
-
Summary:
We had to put the plane somewhat down near the trailer with the main up so that we could get the right contour for the ribs. Reminds me of a B-17 with the main just showing.
|
Photo
|
|
|
|
|
-
Title:
dsc08634
-
Summary:
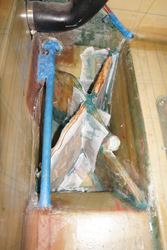
OK now that the plane is off the trailer and on its own wheel we were able to remove most of the trailer hardware and position the ribs. We also used the main bolts to hold the first rib in place. The other rib was left a little lower to be located once
|
Photo
|
|
|
|
|
-
Title:
dsc08635
-
Summary:
Other view of the ribs.
|
Photo
|
|
|
|
|
-
Title:
dsc08636
-
Summary:
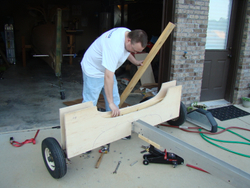
Here is Bill placing in some 2x6's to act as a support for the rear rib. The I-beam is 3 inches wide so the 2x6 fit perfectly. I'll explain later how those come into play.
|
Photo
|
|
|
|
|
-
Title:
dsc08637
-
Summary:
The mono wheel has been removed. Sad to see never used parts coming off the plane.
|
Photo
|
|
|
|
|
-
Title:
dsc08638
-
Summary:
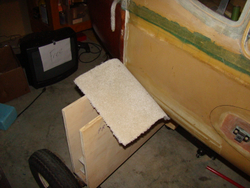
I used some thick good quality carpet to pad the ribs.
|
Photo
|
|
|
|
|
-
Title:
dsc08639
-
Summary:
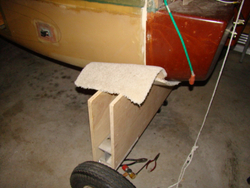
More of the same. I was going to cut the carpet and form it to the ribs and staple it in place but decided that was just a time vampire and pointless since the airframe is holding it in place.
|
Photo
|
|
|
|
|
-
Title:
dsc08640
-
Summary:
OK not the best shot but here you can see I used the jack to move the rear rib in place under the airframe being careful not to pinch the belly. I then secured the rib in place but using some drywall screws in the 2x6. This way any weight will be transf
|
Photo
|
|
|
|
|
-
Title:
dsc08641
-
Summary:
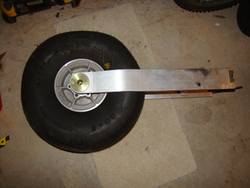
Was going to use another plywood rib here but decided that the wide strap works fine. I later added some foam to the strap to give it some padding.
|
Photo
|
|
|
|
|
-
Title:
dsc08642
-
Summary:
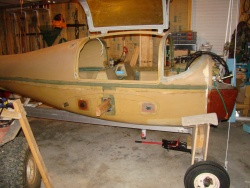
From the start the airframe was sitting 2.5 deg tail low and 0.1 deg to port. Not bad for just putting her on there. I jacked up the back of the trailer to get it as near to 0.0 as possible and also shifted the airframe latterly to turn that .1 to 0.0 a
|
Photo
|
|
|
|
|
-
Title:
dsc08602
-
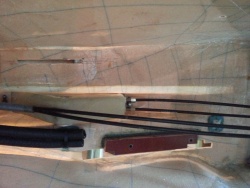
Summary:
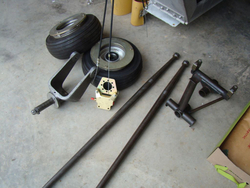
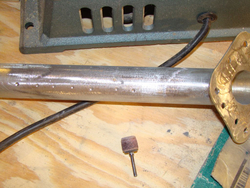
Landing gear parts. The nose gear leg is having MOD 53 performed on it at my fauther in-laws.
|
Photo
|
|
|
|
|
-
Title:
dsc08607
-
Summary:
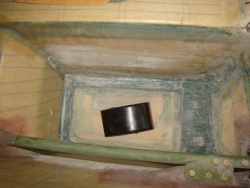
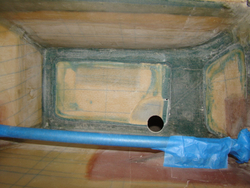
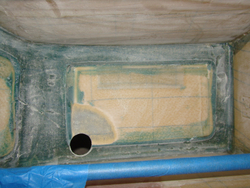
Starting to prep the bays for the tri-gear conversion.
|
Photo
|
|
|
|
|
-
Title:
dsc08661
-
Summary:
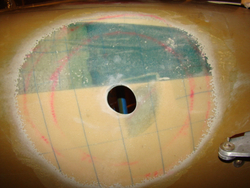
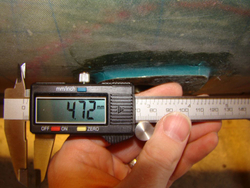
Locating the center of the main gear hole. Used a pilot to be used to measure out the 10“ diameter on the bottom.
|
Photo
|
|
|
|
|
-
Title:
dsc08662
-
Summary:
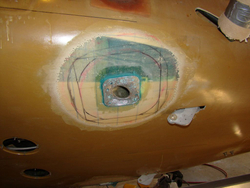
The 10“ diameter from the pilot hole.
|
Photo
|
|
|
|
|
-
Title:
dsc08664
-
Summary:
The gell coat really gums up the sand paper. Still a bit more to remove.
|
Photo
|
|
|
|
|
-
Title:
DSC08797
-
Summary:
Port side
|
Photo
|
|
|
|
|
-
Title:
DSC08799
-
Summary:
Port side
|
Photo
|
|
|
|
|
-
Title:
DSC08800
-
Summary:
starboard side
|
Photo
|
|
|
|
|
-
Title:
DSC08801
-
Summary:
starboard side
|
Photo
|
|
|
|
|
-
Title:
2012-08-18_19-58-15_689
-
Summary:
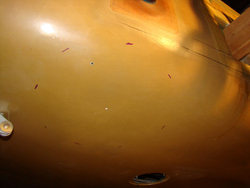
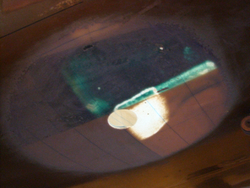
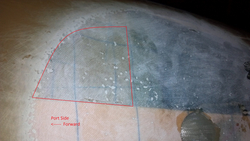
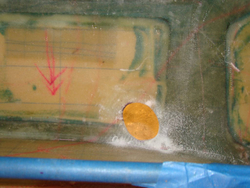
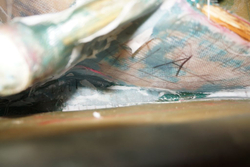
Port side. Red highlighted area shows area with little reinforcement on inside. This is before I did the belly layup per the manual.
|
Photo
|
|
|
|
|
-
Title:
2012-08-18_19-58-42_666
-
Summary:
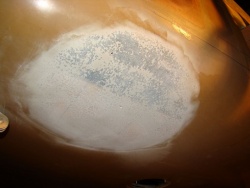
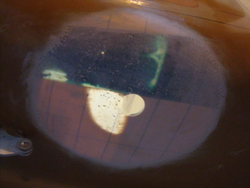
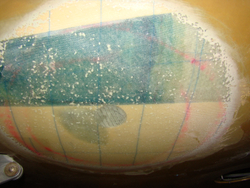
Port side. Same area as before just without the flash. Backlit from the inside to show areas with less material. This is before I did the belly layup per the manual.
|
Photo
|
|
|
|
|
-
Title:
photo
-
Summary:
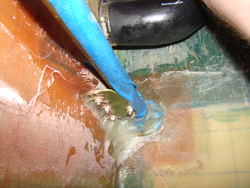
No pictures of the progress of putting in the LG layups on the port side. Here I am putting down the peel ply.
|
Photo
|
|
|
|
|
-
Title:
photo (1)
-
Summary:
Bad pic, but shows the end of the reinforcement layups (port side).
|
Photo
|
|
|
|
|
-
Title:
photo (2)
-
Summary:
Small area to work in. Back was killing me after that job. can't wait to give my back the same treatment when doing the ribs and starboard side.
|
Photo
|
|
|
|
|
-
Title:
dsc08960
-
Summary:
Stb side after layups and peel ply removed.
|
Photo
|
|
|
|
|
-
Title:
dsc08961
-
Summary:
Stb side two layers bid 10" and 8" peel ply removed
|
Photo
|
|
|
|
|
-
Title:
dsc08962
-
Summary:
Stb side. Need to do some clean up...
|
Photo
|
|
|
|
|
-
Title:
dsc08967
-
Summary:
Little clean up required on Port side.
|
Photo
|
|
|
|
|
-
Title:
dsc08965
-
Summary:
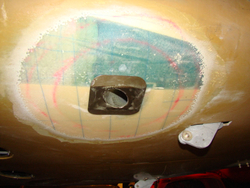
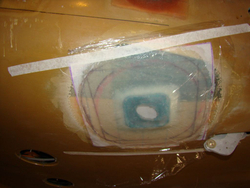
Port side after layups and peel ply removed. Notice shape of hole for the angle of the LG socket. I wrapped the LG socket with sandpaper and used it to form the hole.
|
Photo
|
|
|
|
|
-
Title:
dsc08966
-
Summary:
Port side LG socket hole.
|
Photo
|
|
|
|
|
-
Title:
dsc08963
-
Summary:
Port side. LG socket fitting.
|
Photo
|
|
|
|
|
-
Title:
dsc08964
-
Summary:
Port side. Fitting of LG socket.
|
Photo
|
|
|
|
|
-
Title:
dsc09021
-
Summary:
BIG THANK YOU to my Uncle Kim Prout for flying out to help me with getting the gear legs set. He also helped me slow down and plan ahead. As an excited new builder its easy to get in a rush to try achieve something tangible. Im sure after that week of b
|
Photo
|
|
|
|
|
-
Title:
dsc09018
-
Summary:
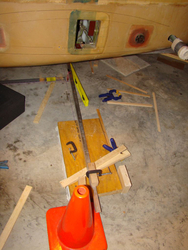
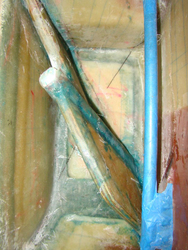
Started to make the axle jig. Used a simple setup of first taking large flat blocks of wood and caulking it to the floor somewhere over FS70. Then that allows me to fix the aluminum angle with a single screw once in its final position.
|
Photo
|
|
|
|

|
-
Title:
dsc09022
-
Summary:
Here you see I used bondo on the shims and screwed them down into the block. The shims made sure the guide was level. Also note the hole drilled in the Aluminum angle and the shim. This is where I fixed the guide for the curing stage to ensure nothing
|
Photo
|
|
|
|
|
-
Title:
dsc09019
-
Summary:
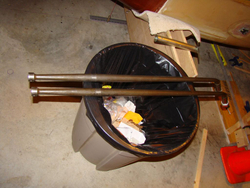
Trash can is the best way to hold the landing gear legs.
|
Photo
|
|
|
|
|
-
Title:
dsc09020
-
Summary:
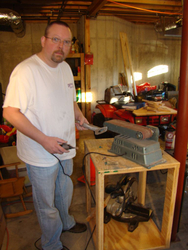
Bill helping by putting a good key on the sockets.
|
Photo
|
|
|
|
|
-
Title:
dsc09023
-
Summary:
Ensure you have a good key. I used the drill press to create the dimples. These will be filled with 420 and flox when doing the glass layups.
|
Photo
|
|
|
|
|
-
Title:
dsc09024
-
Summary:
I was really anal about keeping the socket holes tight. This proved to be more work than it was worth and was fighting the tight fit when it came to locating the axles. Do yourself a favor and just make them a little bigger, 1/8 or so. This gap will be
|
Photo
|
|
|
|
|
-
Title:
dsc09027
-
Summary:
Mixing that expensive 420.
|
Photo
|
|
|
|
|
-
Title:
dsc09028
-
Summary:
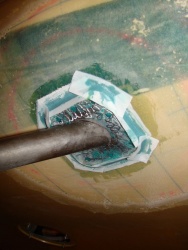
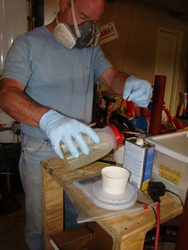
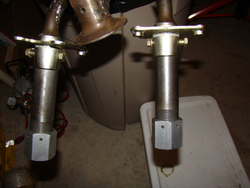
Here the axles are getting the green goop. I used car carnauba wax as a release agent. Worked well jut get it on there thick. We also wrapped the top of the sockets with glad wrap to keep contaminates off of it while we moved it around.
|
Photo
|
|
|
|
|
-
Title:
dsc09029
-
Summary:
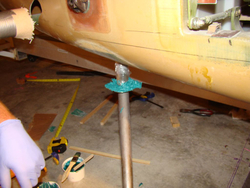
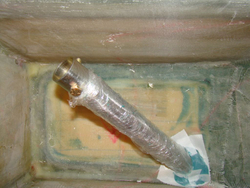
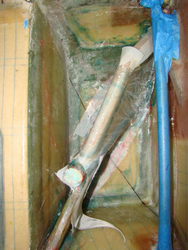
Gear legs clamped in place, no toe in/out per Bud. You cant see it in the photo but I used a green tip .30 bullet as a homemade plum bob that was attached to dead center of the aluminum angle. This helped us keep the guide over the center line. Oh make
|
Photo
|
|
|
|
|
-
Title:
dsc09030
-
Summary:
Starboard side done.
|
Photo
|
|
|
|
|
-
Title:
dsc09032
-
Summary:
Port side done.
|
Photo
|
|
|
|
|
-
Title:
dsc09033
-
Summary:
Port side done.
|
Photo
|
|
|
|
|
-
Title:
dsc09034
-
Summary:
Starboard side done. Pic taken before a little clean up.
|
Photo
|
|
|
|
|
-
Title:
dsc09035
-
Summary:
Rib one after cure of 420 and peel ply removed. Think we used 112g of 420 here due to the odd angle.
|
Photo
|
|
|
|
|
-
Title:
dsc09036
-
Summary:
Rib one port side again used around 112g of 420 cured at 78f for 12 hours.
|
Photo
|
|
|
|

|
-
Title:
dsc09042
-
Summary:
Starboard side being keyed.
|
Photo
|
|
|
|
|
-
Title:
dsc09044
-
Summary:
Port side being keyed.
|
Photo
|
|
|
|
|
-
Title:
dsc09050
-
Summary:
Stbd. side ready for the bid.
|
Photo
|
|
|
|
|
-
Title:
dsc09071
-
Summary:
Uncle Kim glassing in Rib 2.
|
Photo
|
|
|
|
|
-
Title:
dsc09038
-
Summary:
To make our backs happy and life 1000% easier we tilted the fuselage. Notice I used my monowheel trailer as a jig. A tow strap 4" wide was used in the rear to hold the tail. This was rock solid.
|
Photo
|
|
|
|
|
-
Title:
dsc09072
-
Summary:
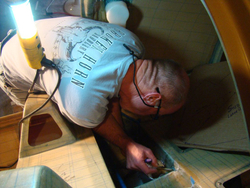
Here is a shot of the working angle. This was so much better than leaning over the edge. Kim's idea. Notice the heater behind Kim, this was key to keeping the temps even though the temps outside were in the 40's.
|
Photo
|
|
|
|
|
-
Title:
dsc09045
-
Summary:
Uncle Kim at work. We would tilt to starboard to work on the port side vice versa.
|
Photo
|
|
|
|
|
-
Title:
dsc09048
-
Summary:
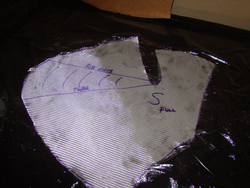
Template for the Stbd side. Note, you are not required per the manual to hook over the plywood with bid.
|
Photo
|
|
|
|
|
-
Title:
dsc09046
-
Summary:
Making a layup schedule for rib 1.
|
Photo
|
|
|
|
|
-
Title:
dsc09047
-
Summary:
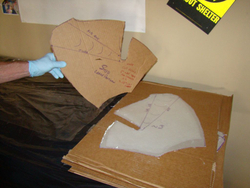
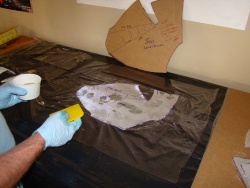
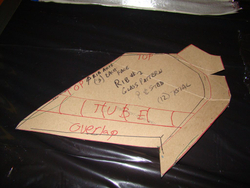
I took cardboard and bent it around the socket and overlapped per the manual. Then took this cardboard and made a new template for cutouts. This made the layups go really quick.
|
Photo
|
|
|
|
|
-
Title:
dsc09051
-
Summary:
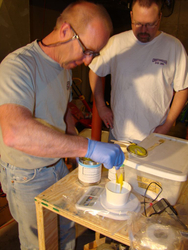
Mix it up Kim! FYI I hate this scale from aircraft spruce, it times out in one min if your plugged in or not. I would have to tap the scale while Kim mixed. We were using masks due to being in an enclosed area and I'm very allergic to the hardener (bumm
|
Photo
|
|
|
|
|
-
Title:
dsc09052
-
Summary:
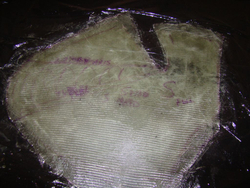
Wetting out stbd side.
|
Photo
|
|
|
|

|
-
Title:
dsc09054
-
Summary:
Wetting out stbd side.
|
Photo
|
|
|
|
|
-
Title:
dsc09055
-
Summary:
Wetting out stbd side.
|
Photo
|
|
|
|
|
-
Title:
dsc09056
-
Summary:
Wetting out stbd side.
|
Photo
|
|
|
|
|
-
Title:
dsc09057
-
Summary:
Wetting out stbd side.
|
Photo
|
|
|
|
|
-
Title:
dsc09058
-
Summary:
Wetting out stbd side.
|
Photo
|
|
|
|
|
-
Title:
dsc09060
-
Summary:
Wetting out stbd side.
|
Photo
|
|
|
|
|
-
Title:
dsc09061
-
Summary:
Applying the layups on stbd side.
|
Photo
|
|
|
|
|
-
Title:
dsc09062
-
Summary:
Bill applying peel ply!
|
Photo
|
|
|
|
|
-
Title:
dsc09063
-
Summary:
Hey Bill!
|
Photo
|
|
|
|
|
-
Title:
dsc09064
-
Summary:
Bill does nice peel ply work!
|
Photo
|
|
|
|
|
-
Title:
dsc09070
-
Summary:
While the layups are curing we stared work on the axles. Had to ream out the holes forMG02.
|
Photo
|
|
|
|
|
-
Title:
dsc09049
-
Summary:
Layup Port side complete with peel ply. Notice the glad wrap to keep air from getting under the peel ply. 420 = 46g, aeropoxy ~ 200g
|
Photo
|
|
|
|
|
-
Title:
dsc09065
-
Summary:
Stbd side peel ply removed.
|
Photo
|
|
|
|
|
-
Title:
dsc09066
-
Summary:
Port side peel ply removed. Oh notice the caps in the sockets. What I did was take a block of foam and push it down in the socket, then took it back out and covered it with car wax. Once all the ribs are in I'll see how it worked.
|
Photo
|
|
|
|
|
-
Title:
dsc09067
-
Summary:
dsc09067.jpg
|
Photo
|
|
|
|

|
-
Title:
dsc09037
-
Summary:
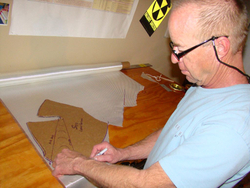
Making a template for rib 2. Do yourself a favor and do not use the templates in the manual you will end up waisting your plywood, just make your own.
|
Photo
|
|
|
|
|
-
Title:
dsc09039
-
Summary:
Port side done after cure.
|
Photo
|
|
|
|
|
-
Title:
dsc09040
-
Summary:
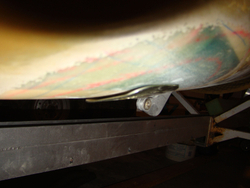
The gap from the bottom of the socket and the belly is as you see. The only way to get it all the way down was to lower the belly to 15" which was not considered an option. Belly hight is 16.0" with the axle width at 82.50" and axle cent
|
Photo
|
|
|
|
|
-
Title:
dsc09041
-
Summary:
Port side guides being placed for layup.
|
Photo
|
|
|
|
|
-
Title:
dsc09069
-
Summary:
Rib 2 stbd side.
|
Photo
|
|
|
|
|
-
Title:
dsc09073
-
Summary:
Rib 2 template.
|
Photo
|
|
|
|
|
-
Title:
dsc09075
-
Summary:
Stbd side after cure. We died the uni in with rib 1.
|
Photo
|
|
|
|
|
-
Title:
dsc09074
-
Summary:
Port side Rib 2 layup.
|
Photo
|
|
|
|
|
-
Title:
dsc09076
-
Summary:
Bottom layup of the port side.
|
Photo
|
|
|
|
|
-
Title:
dsc09068
-
Summary:
Seeing how ribs 2,3,4 line up. Get a belt sander 4x36, you'll be glad you did. Mine is from Harbor Freight.
|
Photo
|
|
|
|
|
-
Title:
nex_2014_01_12_01
-
Summary:
Bolt hole for LG port side filed to size.
|
Photo
|
|
|
|
|
-
Title:
nex_2013_08_24_01
-
Summary:
Stb. side ribs 3 and 4 epibond in place with the 3 layups on all sides. At this point I was getting faster at doing layups however I only did one side at a time.
|
Photo
|
|
|
|
|
-
Title:
nex_2013_08_24_02
-
Summary:
nex_2013_08_24_02.jpg
|
Photo
|
|
|
|
|
-
Title:
nex_2013_08_24_03
-
Summary:
nex_2013_08_24_03.jpg
|
Photo
|
|
|
|
|
-
Title:
nex_2013_08_24_04
-
Summary:
As you see here the port side is done with rib 3 and 4. I didn't have photos of doing the layups.
|
Photo
|
|
|
|
|
-
Title:
nex_2013_08_24_06
-
Summary:
Time for some clean up.
|
Photo
|
|
|
|
|
-
Title:
nex_2014_01_12_02
-
Summary:
Rat's tail rasp works great here.
|
Photo
|
|
|
|
|
-
Title:
nex_2014_01_12_04
-
Summary:
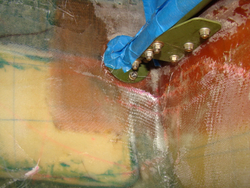
Port LG in place with bolt in.
|
Photo
|
|
|
|
|
-
Title:
nex_2014_01_12_05
-
Summary:
Port side top.
|
Photo
|
|
|
|
|
-
Title:
nex_2014_01_12_06
-
Summary:
She's got a leg!
|
Photo
|
|
|
|
|
-
Title:
nex_2014_01_12_07
-
Summary:
Port side.
|
Photo
|
|
|
|

|
-
Title:
nex_2014_01_25_01
-
Summary:
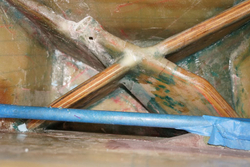
Starboard side after Uni over ribs 3 and 4. Added Bid on the X to reinforce the cuts needed to get the Uni to lay flat. Also filled in Rib 1 air buble.
|
Photo
|
|
|
|
|
-
Title:
nex_2014_01_25_02
-
Summary:
Starboard side of the air bubble fix on rib one. Used Flox with aeroboxy as a fillit.
|
Photo
|
|
|
|
|
-
Title:
nex_2014_01_25_03
-
Summary:
Port side dirty work. Just test fitting final install with all hardware will be after the legs are painted.
|
Photo
|
|
|
|
|
-
Title:
nex_2014_01_25_04
-
Summary:
Bill helping hoist the aircraft up to remove the jig.
|
Photo
|
|
|
|
|
-
Title:
nex_2014_01_25_05
-
Summary:
My lovely bride helping us out. Notice the jig is the mono wheel trailer.
|
Photo
|
|
|
|
|
-
Title:
nex_2014_01_25_06
-
Summary:
Mains on the ground for the first time.
|
Photo
|
|
|
|
|
-
Title:
nex_2014_01_25_07
-
Summary:
What a mess.
|
Photo
|
|
|
|

|
-
Title:
nex_2014_01_25_15
-
Summary:
Doing mod 59.
|
Photo
|
|
|
|
|
-
Title:
nex_2014_01_25_16
-
Summary:
nex_2014_01_25_16.jpg
|
Photo
|
|
|
|
|
-
Title:
nex_2014_01_25_17
-
Summary:
Rolled out on the grass. Notice the tail wheel is still there. I left it in due to not having the stacks of cash to hold the nose down.
|
Photo
|
|
|
|
|
-
Title:
nex_2014_01_25_28
-
Summary:
Wings on. Not really required at the stage. Just had to do it for motivation.
|
Photo
|
|
|
|

|
-
Title:
nex_2014_01_25_31
-
Summary:
Starboard side, need to trim the bolt.
|
Photo
|
|
|
|

|
-
Title:
nex_2014_01_25_32
-
Summary:
nex_2014_01_25_32.jpg
|
Photo
|
|
|
|
|
-
Title:
nex_2014_01_25_35
-
Summary:
Dont judge me! You know you do it too. Anyways, was trying to see if my weight would cause the nose to come down. As you can see she likes being a tail dragger.
|
Photo
|
|
|
|
|
-
Title:
20141102_152814
-
Summary:
Drilling out the screw. It would move. I'm removing this plate to patch later.
|
Photo
|
|
|
|
|
-
Title:
20141102_153539
-
Summary:
Out. Ad you can see the screw is sill in the nut plate. it came out later.
|
Photo
|
|
|
|
|
-
Title:
20141102_154450
-
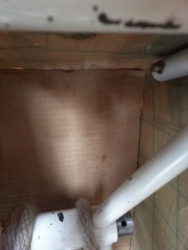
Summary:
Gear cover removed, now for removing the throttle box. This is all prep work to patch up the mono wheel hole.
|
Photo
|
|
|
|
|
-
Title:
20141102_154504
-
Summary:
Cut old fuel lines. Gona have to replace them anyways. Now I just need to remove the stop block where the gear handle went.
|
Photo
|
|
|
|
|
-
Title:
20141102_161000
-
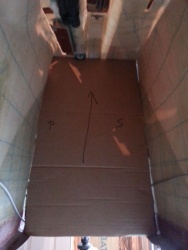
Summary:
template for new firewall.
|
Photo
|
|
|
|
|
-
Title:
20141102_161036
-
Summary:
Everything looking good.
|
Photo
|
|
|
|
|
-
Title:
20141102_161049
-
Summary:
20141102_161049.jpg
|
Photo
|
|
|
|
|
-
Title:
20141102_162118
-
Summary:
Cut it out.
|
Photo
|
|


