|
|
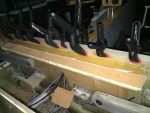
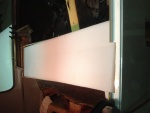
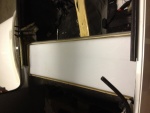
IMG_7235
A strip being bonded to the front wall.
Date: 01/31/2014
Views: 4225
|
|
|
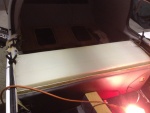
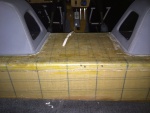
IMG_7029
Supporting material in the form of rigid polyurethane sheet and micro/epoxy mix are laid out on the bottom of the fuselage.
Date: 10/31/2013
Views: 3963
|
|
|
|
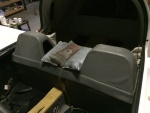
IMG_7730
Returned the upholstery on to the back.
Date: 05/09/2014
Views: 5447
|
|
|
IMG_7738
Everything pretty much back together. Eight months work at this point.
Date: 05/10/2014
Views: 7579
|
|
|
|
IMG_7015
Finally, the new tank is in place. More or less.
Date: 10/23/2013
Views: 4285
|
|
|
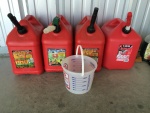
IMG_7768
There's 18 gallons of AvGas in those 4 5-gallon gas cans.
Date: 05/18/2014
Views: 4784
|
|
|
|
IMG_6973_em_sa
Here I have annotated the important elements. The red outlines the fiberglass support bonded to the bottom of the tank. Blue arrow points to the blue crack. The crack formed exactly as a stress analysis says it should, at 45º to the corner of that supp
Date: 10/18/2013
Views: 3379
|
|
|
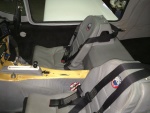
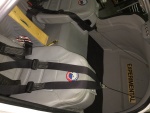
IMG_7736
Reinstalled the shoulder harnesses and seats
Date: 05/10/2014
Views: 5039
|
|
|
|
IMG_6984
But there's no way to get it in. It is too wide to go between the door sills.
Date: 10/21/2013
Views: 4323
|
|
|
IMG_7030
The tank was then put in place so that the urethane and micro could shape themselves to the bottom of the tank
Date: 10/31/2013
Views: 3662
|
|
|
|
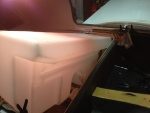
IMG_7366
Applying the fiberglass/epoxy strips to the port side. Plastic wrap to prevent the epoxy from bonding to the tools used to hold the strip in place.
Date: 02/22/2014
Views: 5229
|
|
|
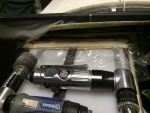
IMG_7383
Port fuel outlet . There was one small leak on the outlet to the fuel selector. I had wrenches ready, just in case, so it was easy to tighten that last bit to end the leak.
Date: 02/23/2014
Views: 3814
|
|
|
|
IMG_6962
The cut on the front side
Date: 10/17/2013
Views: 4213
|
|
|
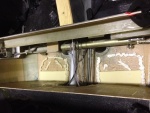
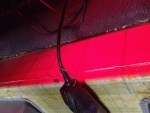
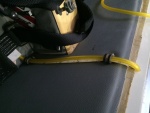
IMG_7438
The back is well bonded across the width of the wall, as are the two sides.
Date: 03/11/2014
Views: 5383
|
|
|
|
IMG_7770
Calibrated sight gage with LED illumination. This really does help identify the fuel level. FYI: 6 gal to the bottom of the lower P-Clip, 7 gal to the top of the P-Clip, 8 gal to the 1st white tie, 9 gal to the 2nd tie, 10 gal to the 1st black tie, 12 g
Date: 05/18/2014
Views: 4665
|
|
|
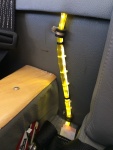
IMG_7285
The new sight gage running up the back rest. 2 P-clips hold it in place. The new sight gage is also back lit with a strip of LED lights.
Date: 02/13/2014
Views: 4069
|
|
|
|
IMG_6971
The top of the old tank exposed. At this point the rotary tool was used to attack the old tank.
Date: 10/18/2013
Views: 3849
|
|
|
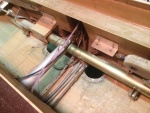
IMG_7005
The space with the aileron tie rod and starboard side support removed.
Date: 10/22/2013
Views: 4371
|
|
|
|
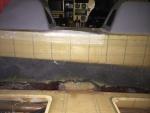
IMG_7321
Checking the back.
Date: 02/17/2014
Views: 5981
|
|
|
IMG_6985
And no amount of "coaxing" will prevail allowing entrance.
Date: 10/21/2013
Views: 4087
|
|