|
|
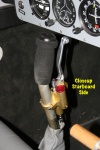
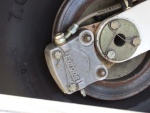
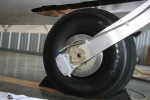
IMG_7380ann
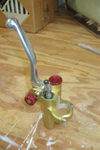
This pic is a closeup of the starboard side of the master cylinder. The red thing is the screw cap covering the brake fluid reservoir.
Date: 03/07/2010
Views: 3077
|
|
|
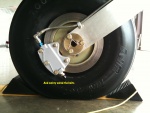
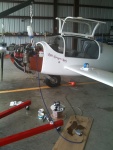
IMG_7266Crop
Date: 02/21/2010
Views: 3554
|
|
|
|
IMG_0916post
Safety wired the bolts and check the installation. Pushed the aircraft and the brake stopped it. Held the brake and tried to push it aircraft. It wouldn't budge. Very good. Pulled it out of the hanger, started it up, let it warm properly and taxi tes
Date: 07/01/2010
Views: 4669
|
|
|
IMG_1218ann
Date: 06/13/2010
Views: 2924
|
|
|
|
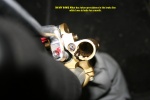
IMG_9556ann
What the heck... There were dead bugs all over the master cylinder. What's going on here. Get out a light, the brake fluid reservoir is full of dead bugs! $#!&$%@%^&*%@$#%%&*&^@$%@%$%$@^#$%^!!!!! Seems that wile I was spending a month
Date: 06/06/2010
Views: 2740
|
|
|
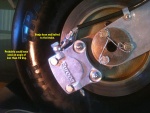
Calliper 2
The best solution is shown in this pic from Mike Parkin. A Banjo fitting. The Banjo bolt is straight threads, it lies low, out of the way of grabby things and is stoutly attached. So, I have a number of bits on order from various suppliers in an attem
Date: 06/23/2009
Views: 2895
|
|
|
|
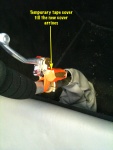
IMG_1167ann
Went to the hanger after work and put the brake back together. Seems to work fine. I have not safety wired it yet as I want to add fluid, bleed and give it a good test beforehand. When all tests wel,l with no leaks, I'll wire it up. Could have used a
Date: 04/19/2010
Views: 2667
|
|
|
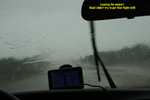
IMG_0048post
And none too soon! This is what I hit departing the airport. We'll see what the weather is like tomorrow morning. Maybe try to fly then.
Date: 07/08/2010
Views: 5044
|
|
|
|
IMG_9557ann
I dug out a bunch, and came to the conclusion that I'm going to have to order a new brake line and clean out the master cylinder before I can continue here. So I went on to the new mechanical fuel pump installation...
Date: 06/06/2010
Views: 2671
|
|
|
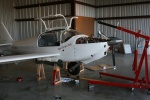
IMG_7267post
Date: 02/21/2010
Views: 2742
|
|
|
|
IMG_9562ann
2010 06 06 - Made up an adaptor that fits the bleed and doesn't leak. Began to run fluid into the system. Went up to the master cylinder/reservoir to check on progress. Was I getting bubbles through the bit of fluid it put in back on the 3rd?
Date: 06/06/2010
Views: 2726
|
|
|
IMG_9534ann
Date: 06/03/2010
Views: 2649
|
|
|
|
DSC04012_Large_post
Date: 10/19/2009
Views: 3474
|
|
|
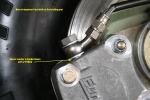
IMG_0036
2010 07 07 - Back to retraction tests. Thought that the fixtures sticking up off the caliper might be a problem. Replaced them with the 90 degree fitting and a straight hose end. Much neater and more compact, but I'll have to bleed the brakes again whe
Date: 07/07/2010
Views: 3184
|
|
|
|
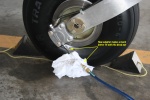
IMG_0912post
After much flailing about which shall not be documented here, I went back to the double puck brake and spent a couple days trying to bleed the new system. Without much luck. I called Robby at Grove Aircraft and he pointed out that if there were any high
Date: 07/01/2010
Views: 2944
|
|
|
IMG_0037
More retraction tests. Closer, but still won't quite go into up lock. Maybe 1/4" (0.635 cm) from engaging. Back under for a couple more hours before I finally see where the blue from the fitting is rubbing on the side of the tunnel where the seat
Date: 07/07/2010
Views: 2808
|
|
|
|
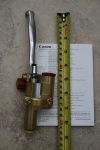
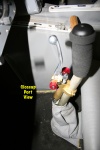
IMG_7387ann
This pic shows the port side of the master cylinder. The red knob is the parking brake. You squeeze the brake lever and turn the knob (top back toward you) and release the lever. This holds the brake on. To release the brake you simply squeeze the bra
Date: 03/07/2010
Views: 3050
|
|
|