|
|
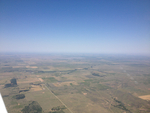
IMG_6146
2013 05 13 More North Texas ranch land.
Date: 05/13/2013
Views: 3230
|
|
|
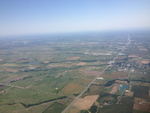
IMG_6153
2013 05 13 The Gainesville Airport
Date: 05/13/2013
Views: 3090
|
|
|
|
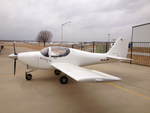
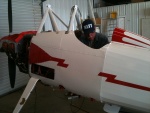
IMG_4309
N914XL as it has been flying recently. Soon there will be wheel pants which will call for another picture.
Date: 12/19/2012
Views: 2964
|
|
|
IMG_0028
2010 07 11 - Flew again! No flight pics. This ground pic will have to do. Flew 1.5, all in the pattern. T/O & L practice. Muchly needed after 4 months off. All full stop & taxi back. No bounce & go's yet. Comfort is returning. Little
Date: 07/02/2010
Views: 2760
|
|
|
|
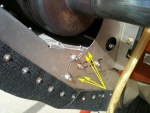
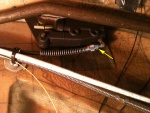
IMG_0873post
Then saw the drop on the engine mount cross-tube and saw more coming across the tube.
Date: 01/24/2010
Views: 2953
|
|
|
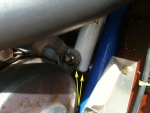
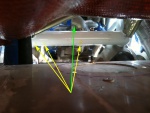
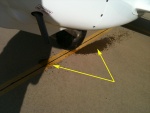
IMG_0874post
Finally, back underneath to find the old drops on the cross tube and there was the tell-tale residue of evaporated coolant on the intake to the coolant pump (Green arrow). Shut things down. Found the longest screwdriver I had and was able to reach the c
Date: 01/24/2010
Views: 3006
|
|
|
|
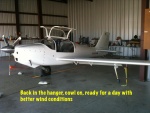
IMG_0876post
Put the aircraft back in the hanger and put the cowl back on to wait for a better day to fly.
Date: 01/24/2010
Views: 2963
|
|
|
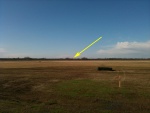
IMG_0877post
Because today it was a 30 degree X-wind gusting to 25 kts. Too much for me at this time. Maybe in another 10 - 15 hours... Might be good flying weather tomorrow after work. We'll see.
Date: 01/24/2010
Views: 2618
|
|
|
|
IMG_0869
Started the engine and let it run a bit and settle down. Started looking for signs of a leak. Took a bit, but finally found some coolant drops.
Date: 01/24/2010
Views: 1946
|
|
|
IMG_0872post
First found them here.
Date: 01/24/2010
Views: 2584
|
|
|
|
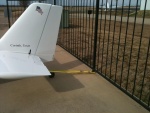
IMG_0870post
2010 01 24 Went to the hanger to work on the coolant leak. Pulled the aircraft out, chocked it and tied the tail to the fence.
Date: 01/24/2010
Views: 2558
|
|
|
IMG_0868post
We completed the metal installation as well as some radio wiring work and the graphics. I had hoped to work on my coolant leak today (23rd) but it's raining. Maybe tomorrow...
Date: 01/22/2010
Views: 2751
|
|
|
|
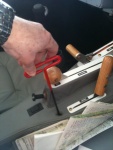
IMG_0836post
Look in the wheel well and at first all looks OK. Closer look reveals a drop of fluid on the connector to the 90 on the bottom of the master cylinder. Put a wrench on it and it is loose. Tightened it.
Date: 01/22/2010
Views: 2520
|
|
|
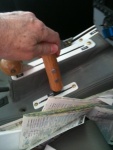
IMG_0837post
Back up to the top and refill the master cylinder. About 2 cc's needed.
Date: 01/22/2010
Views: 2776
|
|
|
|
IMG_0838post
Put the plug back on the master cylinder.
Date: 01/22/2010
Views: 2443
|
|
|
IMG_0840post
And now we have brakes again. Doesn't sound like much, but that's about an hour and a half since arriving at the airport. Pulled the aircraft back out, climbed in, strapped up and went through the start up check list. Turned the radios on and checked w
Date: 01/22/2010
Views: 2810
|
|
|
|
IMG_0841post
Retrieved the tow bar and returned to the aircraft to see coolant, lots of coolant under the aircraft. Not a good sign. Pulled the aircraft back into the hanger, removed the cowl and spent about an hour and a half looking for a leak. Found coolant on t
Date: 01/22/2010
Views: 2649
|
|
|
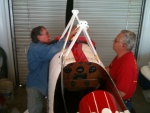
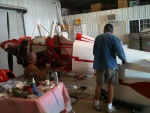
IMG_0846post
So I closed the hanger and went over to Northwest Regional to help Gary put the metal on his Toot.
Date: 01/22/2010
Views: 2889
|
|
|
|
IMG_0847post
Spent the rest of the day helping Gary.
Date: 01/22/2010
Views: 2494
|
|
|
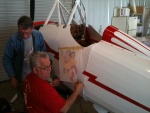
IMG_0858post
We also put the graphics on his aircraft.
Date: 01/22/2010
Views: 2565
|
|