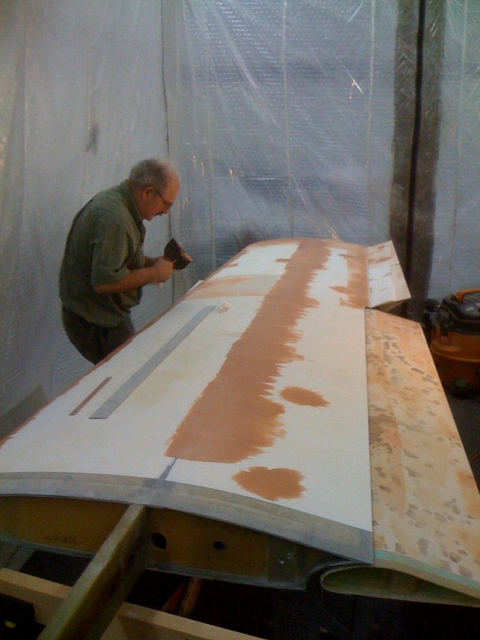
Top of starboard wing.
Top panel seam above spar got filled 80% with dry Q-Cel/Aeropoxy over sticky Aeropoxy, (wet out), then Dry Expancel.
Here is second pass after sanding with Aeropoxy light, (doesn't require wetting out).
A few spots near root, a few spots on top of aileron, trail edge of wing in front of aileron, dual rib area above outrigger and second pass on top of lead edge after first pass was sanded.
Y9-07-24
UPDATED PROCEDURE:
*Make a profile form knife out of a 8" wide plastic spackle knife leaving 1/16" extra fill ~ 1" forward of seam and extending ~ 3" aft of seam.
*Scuff sand with 80 grit and wet out with Aeropoxy/60 minute, after it gets good and tacky fill with very dry Q-Cel about 80% using form knife to check
* After Q-Cel gets good and tacky fill with Aeropoxy Light using form tool mixing 30 grams at a time
* After Aeropoxy Light gets good and tacky, fill any holes and depressions with Aeropoxy Light applied with a 2" wide spackle knife, all this wet on wet saves sanding and curing in between
* 3 foot 80 grit snow picket to get off high spots, then 3 foot 120 grit to begin forming, OK to switch to 3 foot 180 grit for areas you don't want to go too far with, then go after with 2 foot and 120grit, then 2 foot and 180 grit. Found keeping sanding bars parallel with spar and sanding at a 45 degree angle one way then other, focusing on high areas worked well. Need to adjust setting on calibrated fingers to sensitive while trying to not let different textures fool you.
Use Mk 1 calibrated Eyechrometer as only a secondary inspection tool.
Y9-08-07


