Login
EuropaOwners Jeroen Glazener Kit 615 PH-GLZ Chapter 22 Rudder System
Advanced Search
View Latest Updates View Popular Items View Random Items View Slideshow View Slideshow (Fullscreen)

Jeroen Glazener Kit 615 PH-GLZ

1. In the... ... 19. Chapter 19 ... 20. Chapter 20 ... 21. Chapter 21T... 22. Chapter 22 ... 23. Chapter 29 ... 24. Chapter 23 ... 25. The dream... ... 41. Upholstery

Random Image

061602_Fuelpipe_jpg

061602_Fuelpipe_jpg

Date: 12/31/1969 Views: 1553

Chapter 22 Rudder System

Staring defeet in deface

Date: 10/29/2009
Owner: Jeroen Glazener
Size: 18 items
IMG_1114

IMG_1114

Foam edges to make the floor level

Date: 08/11/2009
Views: 2773
IMG_1115

IMG_1115

Trimming plywood to fit the footwell

Date: 08/11/2009
Views: 2477
IMG_1116

IMG_1116

Bid on the bottom of the plywood

Date: 08/12/2009
Views: 2346
IMG_1118

IMG_1118

Dominique is the first to sit in the fuselage and make airplane noises. I am proud but don't want to sit in it myself yet, having been warned by Jack that the whole fuselage might double up (his did).

Date: 08/12/2009
Views: 2600
IMG_1119

IMG_1119

Test assembly of the rudder pedals. I have found a local company who have powder coated the parts for me.

Date: 08/16/2009
Views: 2688
IMG_1120

IMG_1120

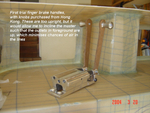
Now assembled in the footwell. A bit of a Chinese puzzle, trying to keep the hole in the firewall small yet getting all the parts in place.

Date: 08/20/2009
Views: 2485
IMG_1121

IMG_1121

Anchor nuts on the bottom of the plywood

Date: 08/23/2009
Views: 2512
IMG_1579

IMG_1579

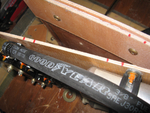
The Tufnol blocks in place. When first fitting as above these seem to fit snugly around the pedals. In practice they need a lot of sanding because any twist or misalignment will cause the the whole lot to jam as soon as you tighten the last bolt. And it doesn't make any difference, whatever order you tighten, it's always the last one, and you have no idea where it is actually jamming. Zennn..... A dremel with drum sander works best here.

Date: 04/06/2010
Views: 2935
IMG_1593

IMG_1593

Preparing the layup on plastic. This is not a Class A part, so a great way to get rid of all those cut-offs.

Date: 04/11/2010
Views: 2363
IMG_1582

IMG_1582

Parcel tape to prevent premature rudder lock. Flox to fill up any gaps between floor and wall. Large piece of bid on the front, smaller in the rear, tiny one on the side and it's covered.

Date: 04/06/2010
Views: 2808
IMG_1600

IMG_1600

The rudder system is all "fly by wire". First step is threading the rudder cable through the sleeve

Date: 04/13/2010
Views: 2393
IMG_1601

IMG_1601

Using the "Swage-it" tool the sleeve is then compressed.

Date: 04/13/2010
Views: 2544
IMG_1602

IMG_1602

Cutting the supplied cable in two. The manual suggests using a cold chisel (a what??) but with a cut off disc it takes just seconds.
TIP: don't cut it in two. Turns out later that part of the wire is meant for the restraining of the NLG. Cut that off first!

Date: 04/13/2010
Views: 2508
IMG_1603

IMG_1603

The cable is then attached to the rudder arm, together with a spring to keep the lot under tension.

Date: 04/14/2010
Views: 2357
IMG_1604

IMG_1604

A hole through the bulkhead lets the cable through.

Date: 04/14/2010
Views: 2351
IMG_1605

IMG_1605

Two tufnol blocks are needed to keep the cables away from the motor frame. Here they are shaped to prevent snagging.

Date: 04/14/2010
Views: 2386
IMG_1606

IMG_1606

Bonding the blocks to the side of the tunnel. Duct tape to keep it from gently sliding off again. Duct tape is like the Force. It has a dark side, a light side, and it keeps the universe together

Date: 04/14/2010
Views: 2559
IMG_1607

IMG_1607

Stuck.

Date: 04/15/2010
Views: 3925
Page: 1
Powered by Gallery v2.3